
Introduction

Administrator Tasks:
System Requirements
Hardware Requirements
- The PC should have at least 1 free USB port for the card encoder
Software Requirements
- Internet Explorer 6.0 or later version
- Operating System : WINDOWS 7 or later
- Database management software: SQL SERVER 2012 or Later with Studio Workstation
- To ensure stable operation of the hotel lock software; its strongly recommended that all unnecessary software be refrained from installation on same PC
Software Installation
Installation steps
- Open the installation media and find the executable file.
- Click [next], the following window will be displayed see figure 2
- Enter user name and name of organization in blank fields, click [Next]
- You can see the default path as ‘C:Program Files (x86)KasMHS’, If another path is desired click [Change]
- Click [Install] on Figure 5 to start the installation
- Type in the username in the "User name" field
- Place your System Card on the reader
- Click "Forget Password"
- With the "Password" field empty, click "OK"
- You will be prompted to create a new password. Ensure that "Current Password" is empty.
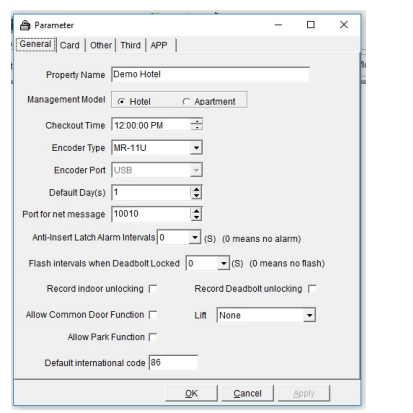
- Hotel Mode – Sets Checkout Date 1 day ahead of the Guest Card’s creation day.
- Apartment Mode – Sets Checkout Date 1 month ahead of the Guest Card’s creation day.
- Best practice is to leave this on Hotel and modify the default check out time and days as desired.
- Select "System" in the system menu.
- Select "Change Password"
- Select "System" in the system menu.
- Select "Users"
- Select "Set Password" (figure 25)
- Select "System" in the system menu
- Select "System Parameters"
- Ensure "Allow Common Door Function" is ticked
- Click "Apply" and then "OK"
- Select "Data" in the system menu.
- Select "Common Door"
- Click "Add"
- Configure the door as required:
- Code: Leave it as default, this is usually set automatically by the system
- Name: Common Door’s name
- Floor: What floor is belongs to (Can only be set if Floors have been configured)
- Auto Open: Designate a time for the door to automatically open to everyone (e.g. Front reception door)
- Open Time: Designate a time window for the guests to be able to open the door (e.g. a gym)
- Default Authorization: Whether or not a Common Door will automatically be selected when creating a card that can have Common Door access
- No Guest Card Enter: Whether or not a Guest Card can open this Common Door (e.g. if you want staff-only common rooms)
- Click "Save"
- By clicking on the "Setting Cards" button found on the menu bar in the left-hand window.
- By clicking "Card" in the system menu, and then "Setting Card"
- By clicking the "Setting" icon at the top menu bar
- By clicking on the "Staff Cards" button found on the menu bar in the left-hand window.
- By clicking "Card" in the system menu, and then "Staff Card"
- By clicking the "Staff" icon at the top menu bar
- By clicking on the "Room Type" button found on the menu bar in the left-hand window
- By clicking "Card" in the system menu, and then "Guest Card"
- By clicking the "Guest" icon at the top menu bar
- Place a card in the card encoder and click [Issue].
- If a card had been used before and still contain valid data the system will prompt and ask to confirm before erasing the old card data, click [Yes] to confirm.
- After a successful confirmation message appeared, remove the card from the card encoder and you have successfully created a System Card.
- Place a card on the card reader.
- Check the tick-box next to Clock Setting to transfer PC time to the lock (This is optional – But negates the need for a Clock Card).
- Tick the room you wish to Parameter Card to program. (Note: Multiple rooms can be selected, however only 1 room can be programmed on each card. When selecting multiple rooms, the system will ask for a new card between each room).
- The "Lock" submenu has guest rooms, as well as office rooms.
- The "Door" submenu has common doors.
- The "Lift" submenu has lifts.
- The "Park" submenu has parking access.
- Click "Issue". If the card is already used, the system will ask if you wish to overwrite it. Click "Yes" or change to a blank card. See Figure 51.
- Take your System Card, Parameter Card, a Guest/Staff card (depending on the door type), and a Clock Card (*optional: Not necessary if you used the "Clock Setting" function)
- Present the cards to the lock in the following order: System Card -> Parameter Card -> Clock Card* -> Guest/Staff card
- The lock should sound a single beep after each card, and the door should unlock to the Guest/Staff card.
- Place a card on the reader
- Click "Issue"
- If the card is already used, the system will give you the option to overwrite it. Click "Yes" or place a blank card.
- Present the Clock Card to the desired lock.
- Place a card on the reader
- Click "Issue"
- If the card is already used, the system will give you the option to overwrite it. Click "Yes" or place a blank card.
- Place a card on the reader
- Select which floors you wish it to access (Multiple floors are allowed) and any Common Doors you desire.
- Click "Issue"
- If the card is already used, the system will give you the option to overwrite it. Click "Yes" or place a blank card.
- Place a card on the reader
- Select the End Date of the card (expiry)
- Select the Open Time (Time window where the housekeeping card will open the doors)
- Select which floors the housekeeping card is applicable to (Multiple floors are allowed), and any Common Doors
- Click "Issue"
- If the card is already used, the system will give you the option to overwrite it. Click "Yes" or place a blank card.
- Place a card on the reader
- Set the End Date (expiry)
- Select which Office doors the card will open (Multiple doors are allowed)
- Click "Issue"
- If the card is already used, the system will give you the option to overwrite it. Click "Yes" or place a blank card.
- Select "Room Type" in the left-hand window, select the appropriate room type (default: "Guest"), and select the room you wish to issue a Guest Card for.
- OR click the "Guest" button on the top menu (Figure 58).
- Place a card on the reader
- If the room isn’t already on the list, select it from the "Room" drop-down menu (See: Figure 60)
- Fill in the "Checkout" date & time
- OR simply select "Day(s)". This will use your predefined default checkout time.
- Optional: Fill in the "Checkin" date & time. By default this is the current day & time.
- Select how many "Card(s)" to issue (e.g. if several guests for the same room need cards)
- Optional: Select "Multi-Room card" if the guests have multiple rooms they have access to. Ensure they are on the list as mentioned in Step 2.
- Select any Common Doors the guests should have access to.
- Click "Issue"
- If more than 1 cards were selected to issue, the system will prompt you when to place the next card.
- Present a Floor Card to lock and wait for an audible tone
- Present the Meeting Card
- Place a card on the reader
- Press "Issue"
- Place a card on the reader
- Press "Issue"
- Select "Card Type"
- Select "Status" (default: Normal Use, unless it was marked as Lost/Damaged in "Card -> Lost and Damaged")
- Click "Query" to present a list of all the locks of the selected type & status
- Tick the card you wish to erase
- Under "Suit" select the door type (Room or Common)
- Place a card on the card reader and click "Issue"
- Present the Erase Card to the lock
- Select which types of cards to erase from the lock
- Place a card on the reader and click "Issue"
- Present the card to the door
- Place a card on the reader
- Select the S/N (Default: 1. See below for further details)
- Press "Issue"
- After the Query Card is issued, present the Query Card (S/N 1) to the lock you wish to download the audit logs from.
- The first query card (S/N 1) is capable of storing 1 – 420 events, if more events are stored on the lock, use the first in conjunction with a second query card (S/N 2) to increase the storing capacity to 830 events.
- The lock will flash a green LED and a short tone will be heard. Hold the card to the lock until a long tone is heard and the LED turns off.
- Place the Query Card on the card reader
- Select "Card" from the system menu
- Select "Read Audit Trial"
- OR click the "Audit" icon at the top bar
- Type in the Group Name
- Select the "Checkin" and "Checkout" times
- Select how many "Card(s)" each room requires (this can be modified per room by Right Clicking the room on the list and then selecting "Cards")
- Select the "Room No." to add to the list of rooms to issue a card for
- Select the Common Doors that they will have access to
- Place a card on the reader and click "Issue"
- When prompted, remove the card and place a new one for the next room / person, until the process is complete.
- Place the card on the card reader
- Click "Read‘ in main tool bar, and a window will pop up with the card’s information (Figure 66).
- Click "Erase" to delete all data in card to make it a blank card.
- Click "Read" in main tool bar, and a window will pop up with the card’s information (Figure 66).
- Change the details as desired and click "Modify"
- Place the guest card on the reader
- Select "Read" from the top menu bar
- Change the Checkout Date
- if changing a room, delete the current room from the list, and add a new one.
- Click "Modify"
- Place Guest Card that needs to be checked out on the card encoder.
- Click "Read" in top menu bar, the system will read data from card and display it (Figure 70).
- Click "Check Out". This will erase the Guest Card.
- Recommendation: Issue an Erase Card to remove that card from the Guest Room (see above: Erase Card) and present it to the door immediately.
- Select "Card" from the system menu
- Select "Lost and Damaged" (Figure 71)
- Tick the "Card Type" and select "Guest Card"
- Click "Refresh"
- Select the card that has been lost / damaged
- Click "Lost" or "Damaged"
- Issue a new Guest Card for the Guest (see above: Guest Card) – NOTE: Ensure you are selecting "New Key" is selected, so it will invalidate any previous keys.
- Please refer to the "Common Door" section above.
- Please refer to the "Meeting Card" section above.
- Single Channel – The select lift Floor box is not displayed when issuing Guest cards, Guest cards will by default have lift access to the level that the Guest room resides on.
- Multi Channel – The select lift Floor box is displayed when issuing Guest cards and a Guest card can be issued to access multiple lift levels.
-
Lift Zone
-
Setting Lift Controller
-
Correlate Lift
-
Managing Parking
-
Enable Parking function
-
Setting Parking
-
Correlate Parking
Initial Software Setup
Connecting to SQL Server

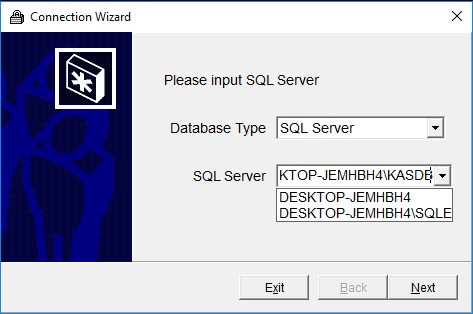
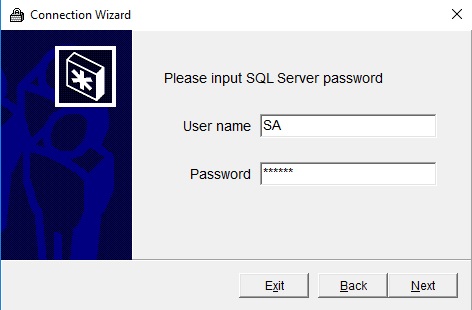
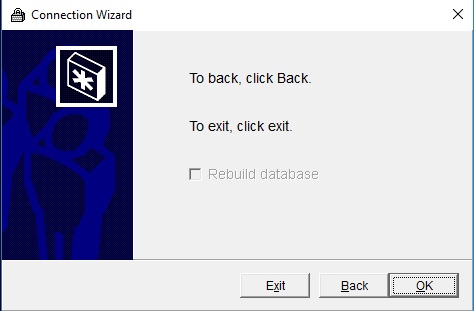
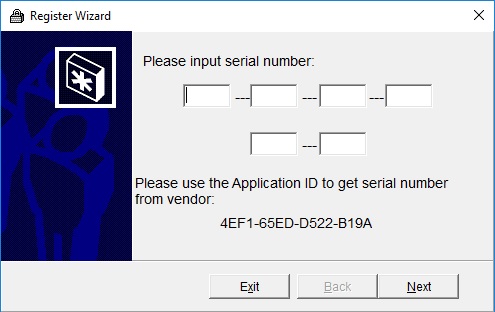
Inputting License Code
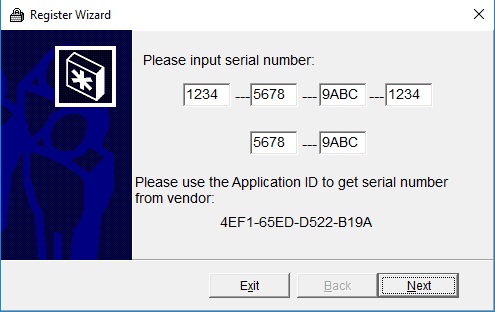
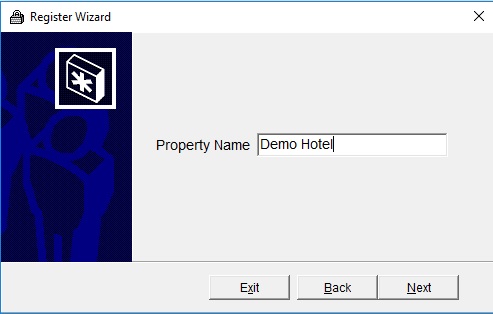
Software log in
Login

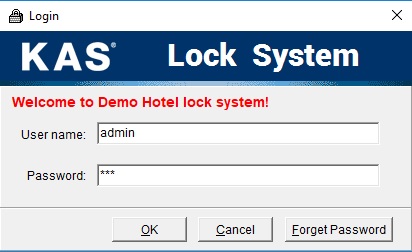
Forgot Password
Software Layout
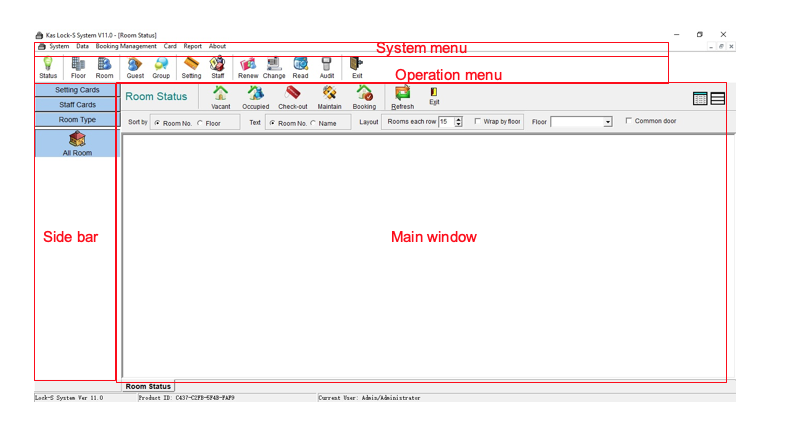
Operation menu – Quick selection for card reading/room setting
Side bar – Display windows to program all types of cards
Main window – Displays the current main window
Parameters and Configuration
System -> System Parameters
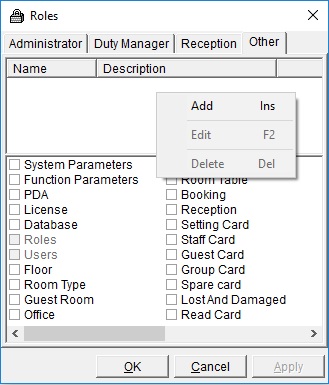
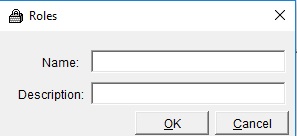
Managing Roles
 [Administrator] roles cannot be modified.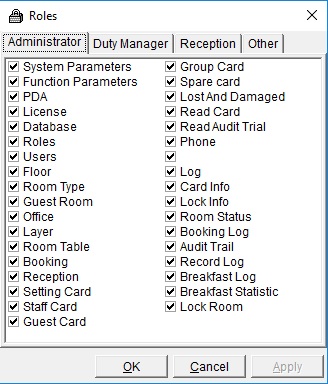
Managing Users
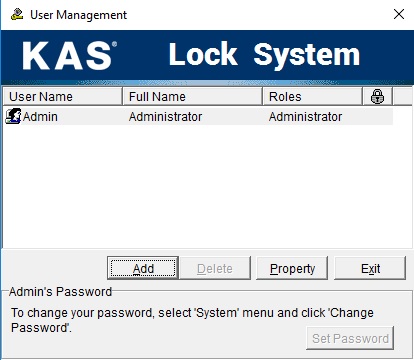
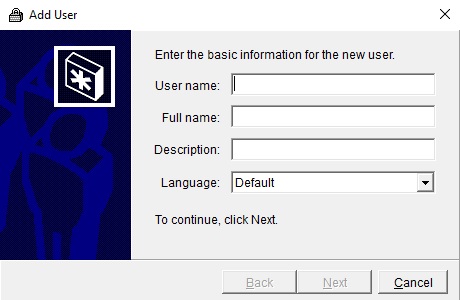
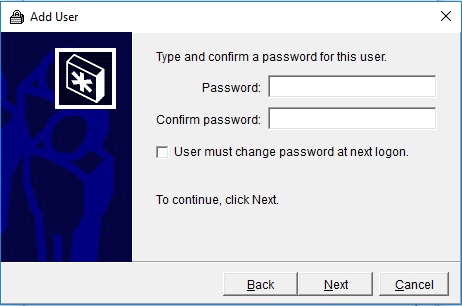
Figure 21
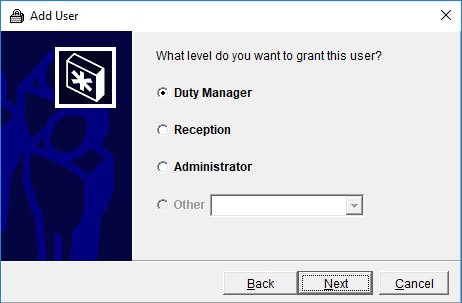
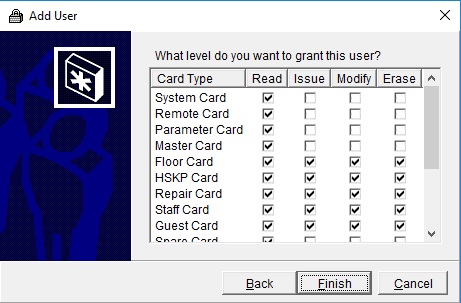
Figure 22
Managing User Property
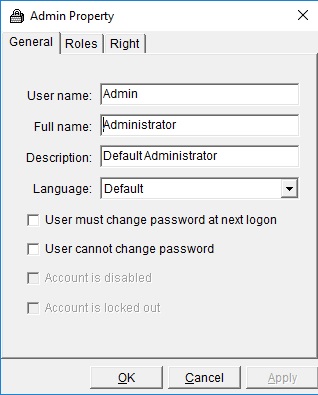
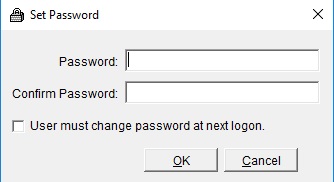
Figure 25
Managing Floors
Build Floors Wizard
In the system menu, click "Data" then "Floor" in the pull-down menu. See Figure 26.

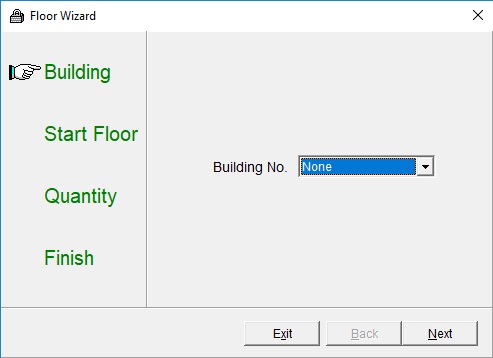
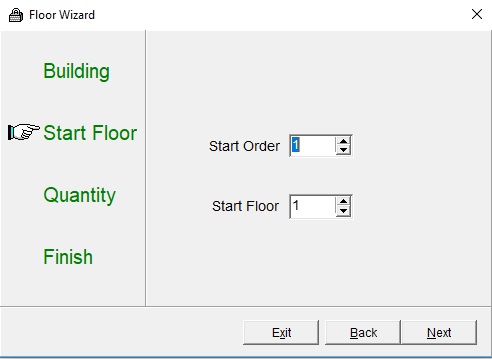
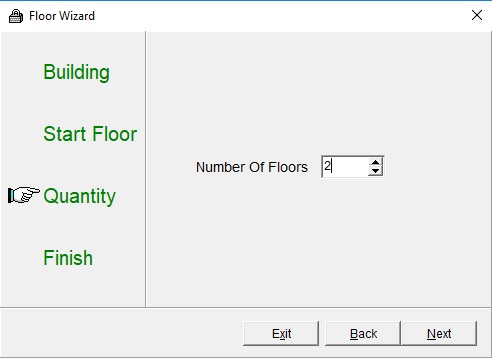
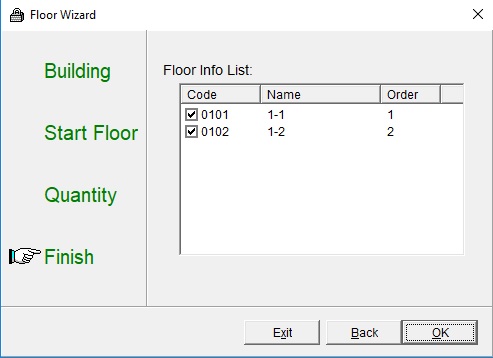
Figure 30
Modify floors manually
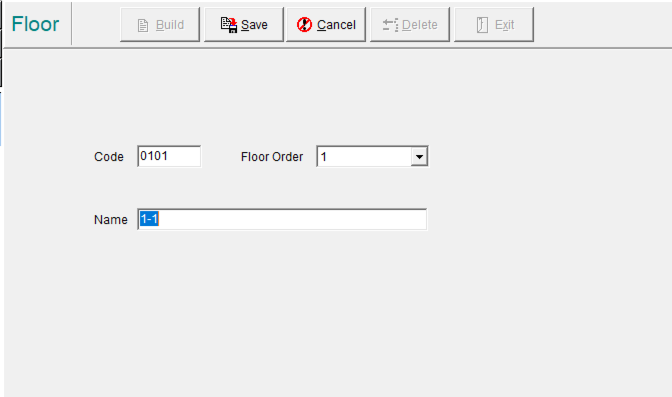
Edit Floor:
Delete Floor:
Set Room Type
Add room type
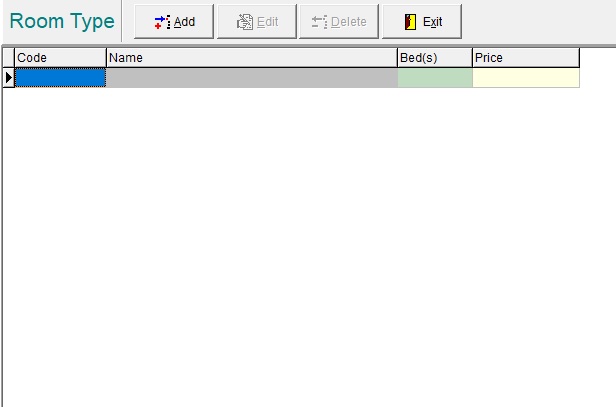
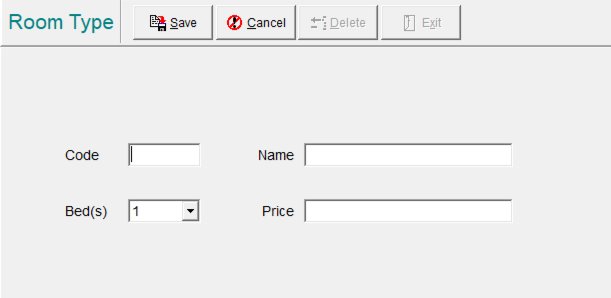
Edit room type
Delete Room Type
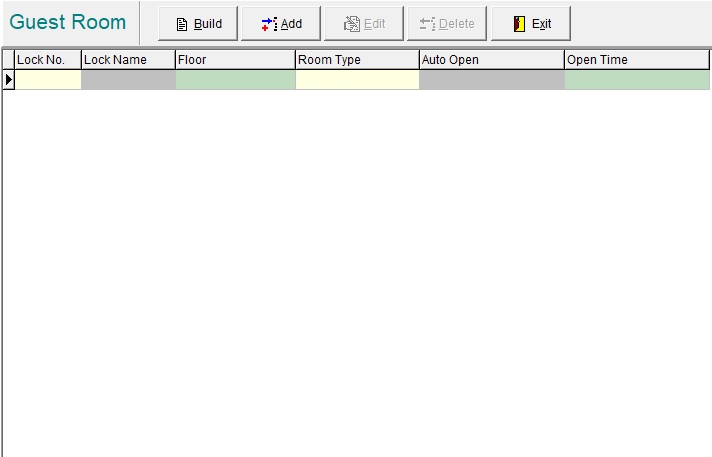
Build Guest Room Wizard
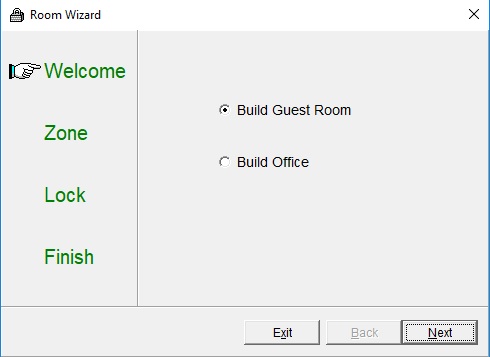
Select ‘Build Office’ radio button to build a series of Office doors.
Staff cards will only open Office doors. Similarly, Guest cards will only open Guest Rooms (and common doors).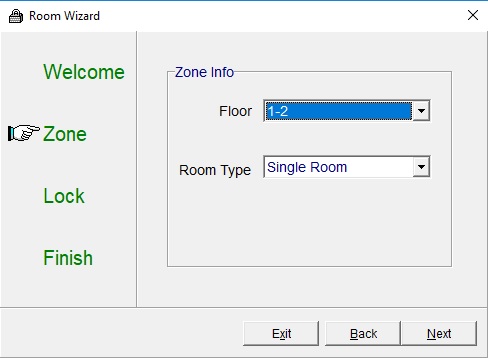
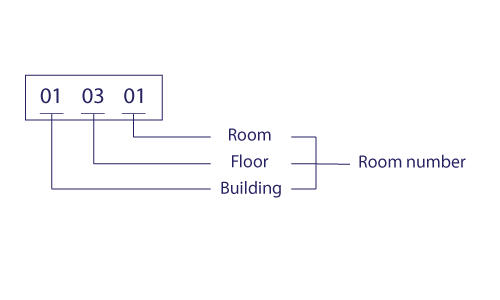
Please note: the room number can does not have to be the same as the above format.
The building wizard will force this format but if you wanted a completely different room number structure, you are welcome to manually create/edit each room. i.e Rooms 1-40 have the room numbers “01-1,01-2,01-3,…,01-30” if you desire.
N.B If you edit the following fields, you do NOT have to re-program the doors; Lock No., Lock Name, Room Type, Auto Open, Open Time. If you edit the Floor field, you will need to re-program the door lock.
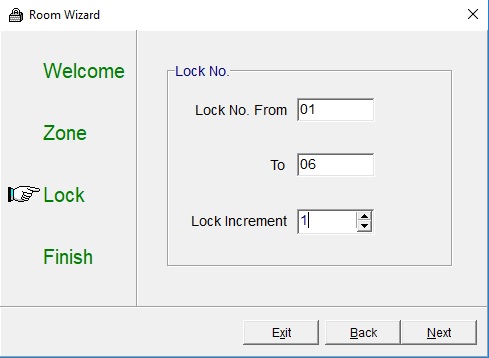
Figure 37
Enter the number of locks per floor. You can also append and remove locks later if you wish.
This example is 6 locks per floor; ‘01’ to ‘06’.
Lock Increment is the step between each lock. Leave this field as ‘1’ unless required otherwise.
Click [Next], and Figure 38 will appear. Check the Guest rooms in the list to make sure they are correct, click [OK] to confirm and save data.
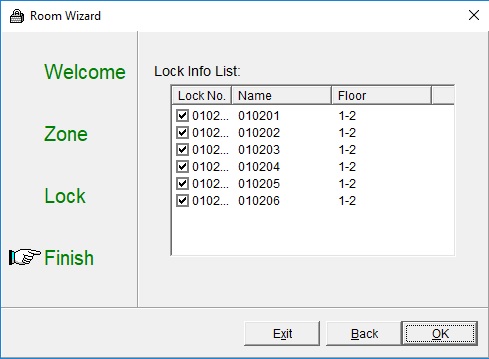
Figure 38
The software will prompt if the rooms have been built correctly, click [Yes] to confirm. See Figure 39
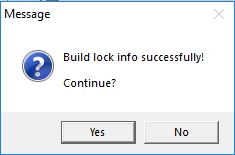
Figure 39
Edit Room:
Delete Room:
Manage Common Rooms
Creating a Common Room:
Manage Office Doors
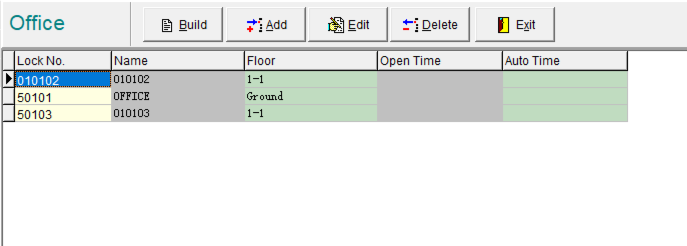
Figure 40
Managing Lock Layers
Setting Layer Structure
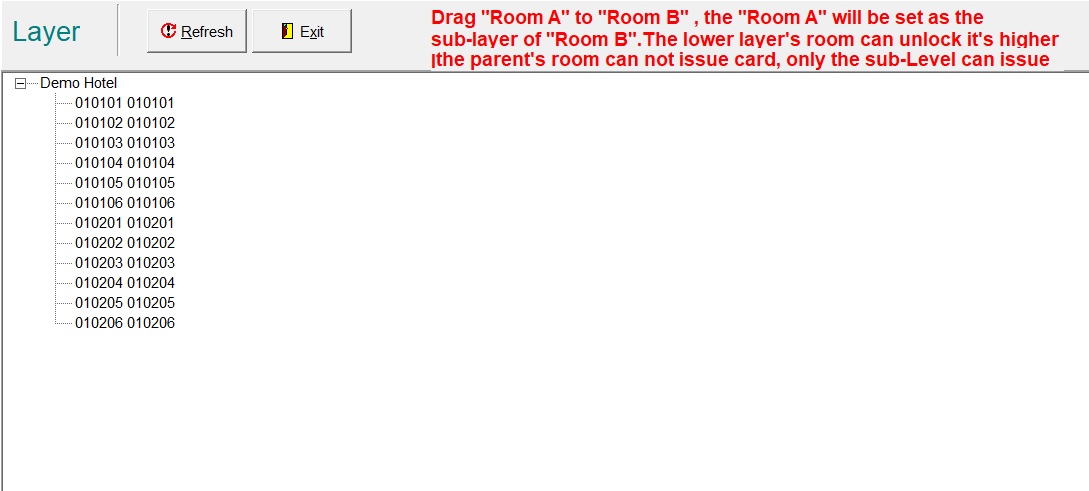
Figure 41
Adjust Layer Structure
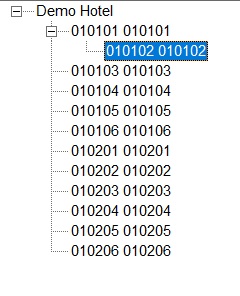
Figure 42
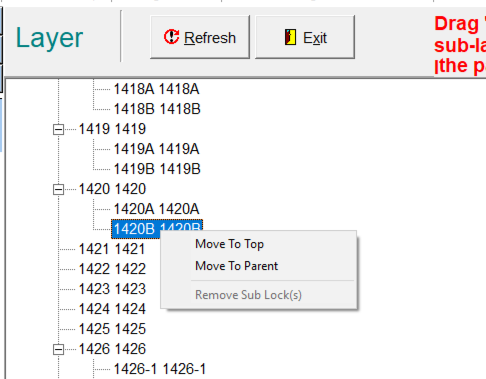
Figure 43
Room Status Query
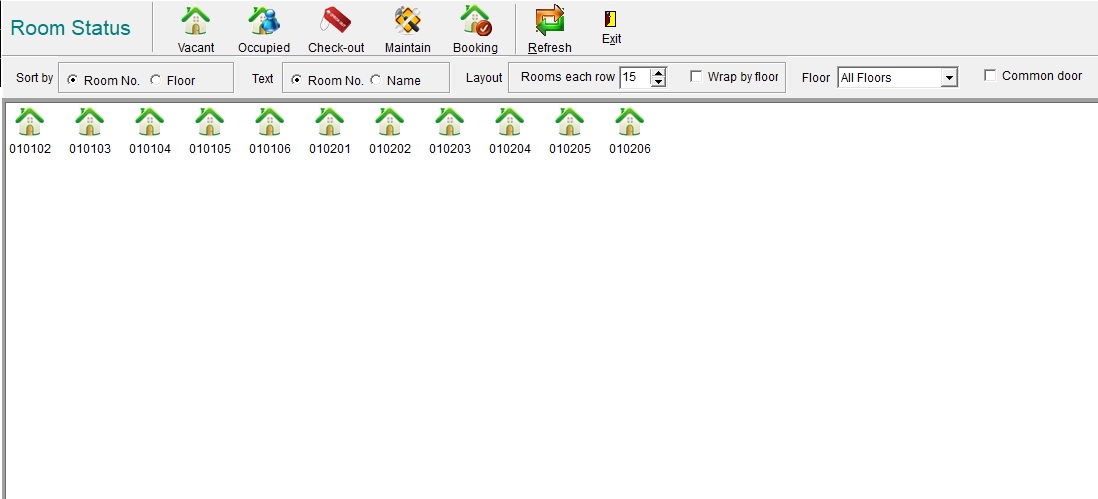
Figure 44
Display by Room Type: On left column in this window all room types set earlier will display, click any guest room type will show only rooms that fall under that particular room type. Clicking [All Room] will show all guest rooms, clicking [Office] will show all office rooms.

Figure 45
Display by Room Status: After display under room type, more criteria are shown on top bar see Figure 45, click on the icon to show rooms that meet other particular criteria such as vacant rooms, occupied rooms, checked-out rooms, rooms under maintenance and rooms with bookings.

Figure 46
Window Layout
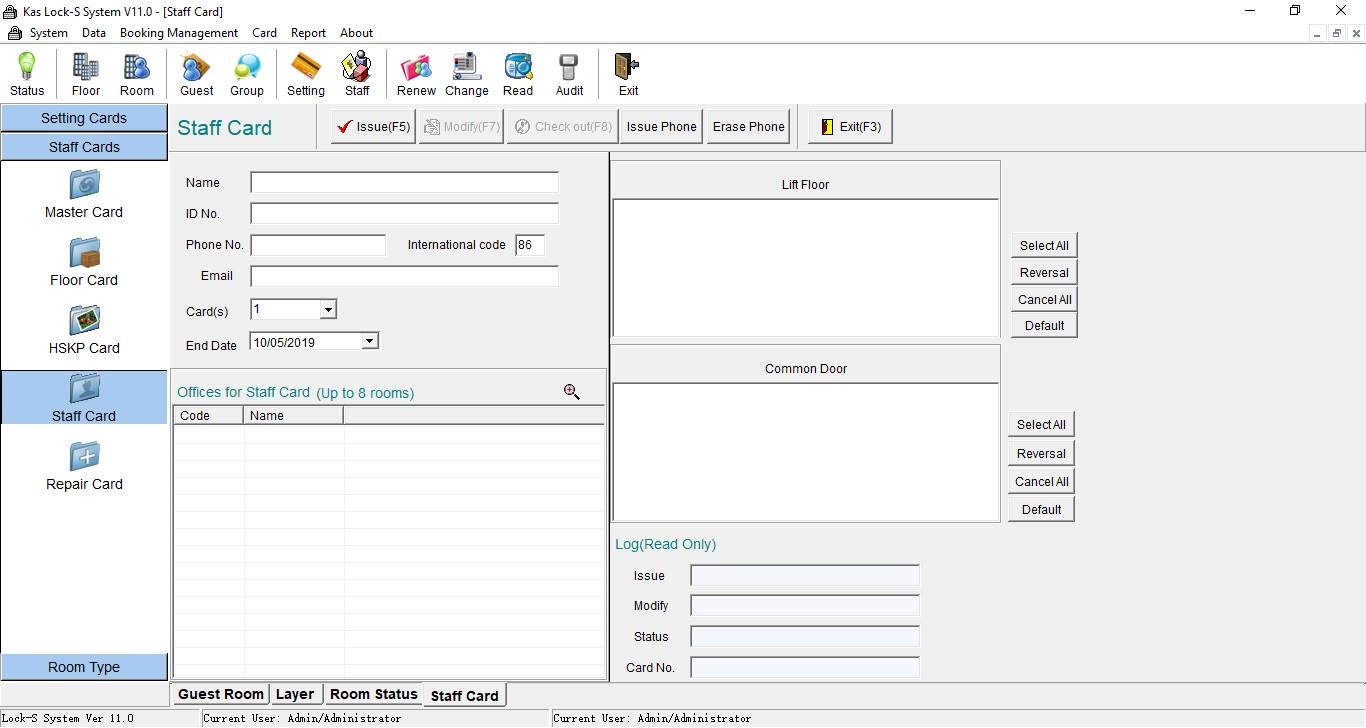
Figure 47

Figure 48
Card Types
Setting Cards
Staff Cards
Guest Cards
Issuing Cards
System Card
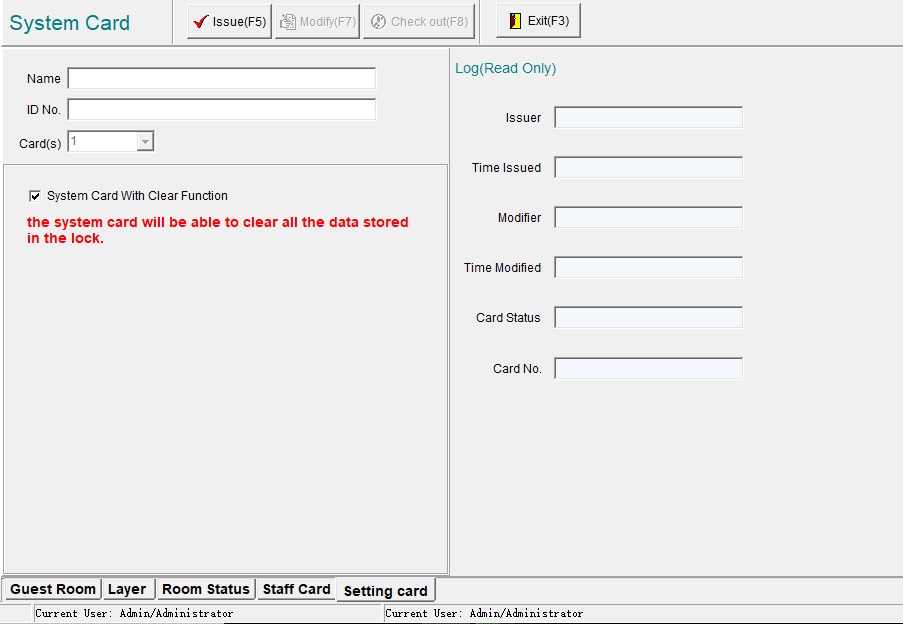
Figure 49
Parameter Card
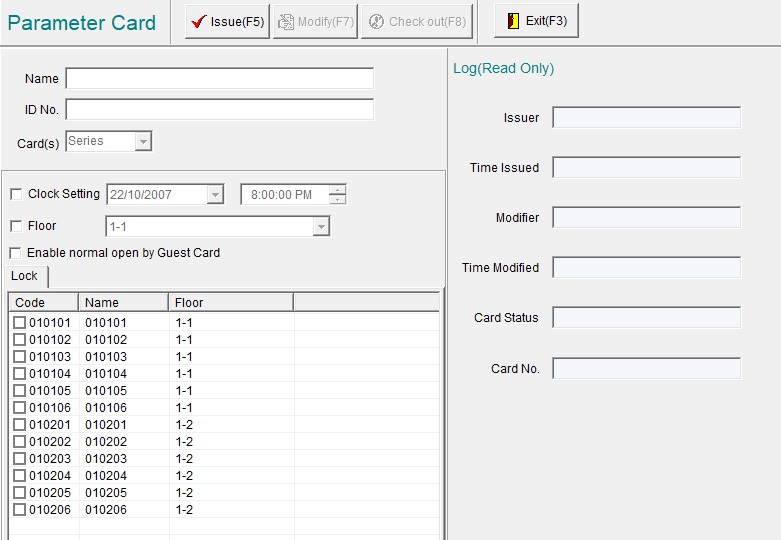
Figure 50
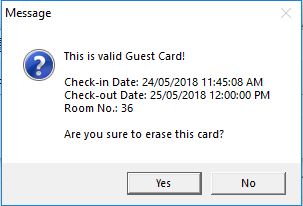
Figure 51
If only one lock is selected, a remove card message will appear after encoding is completed. See Figure 52.
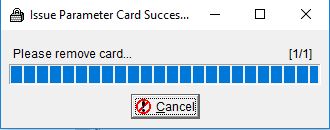
Figure 52
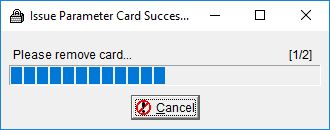
Figure 53
Clock Card
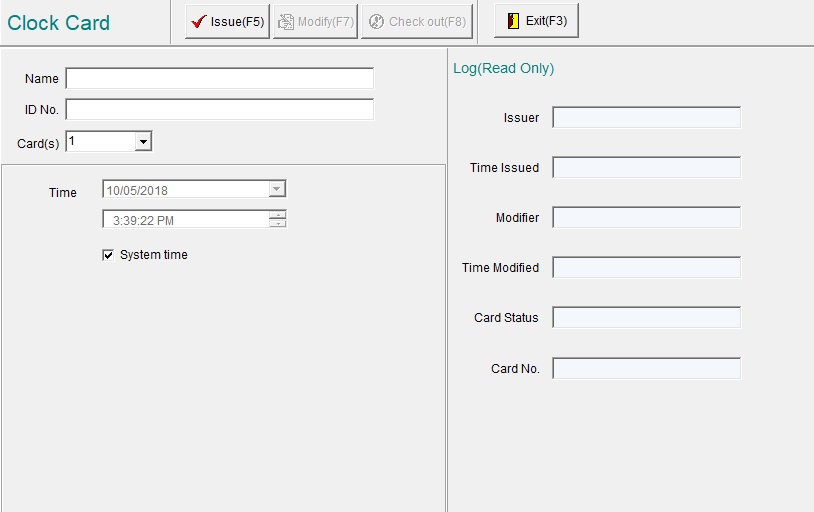
Figure 54

Master Card
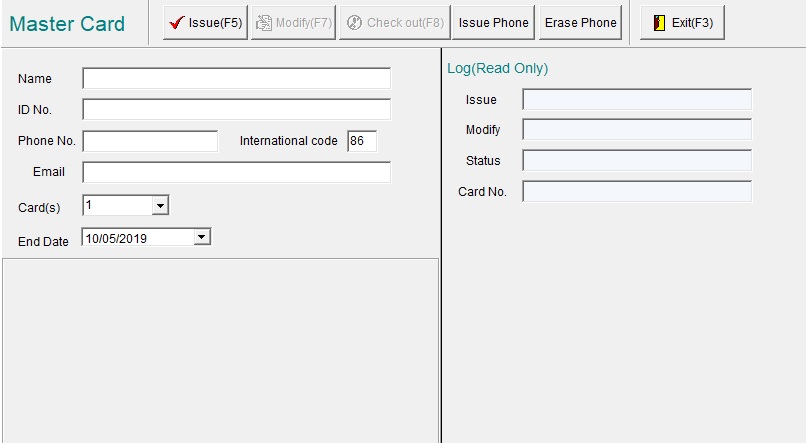
Figure 55
Floor Card
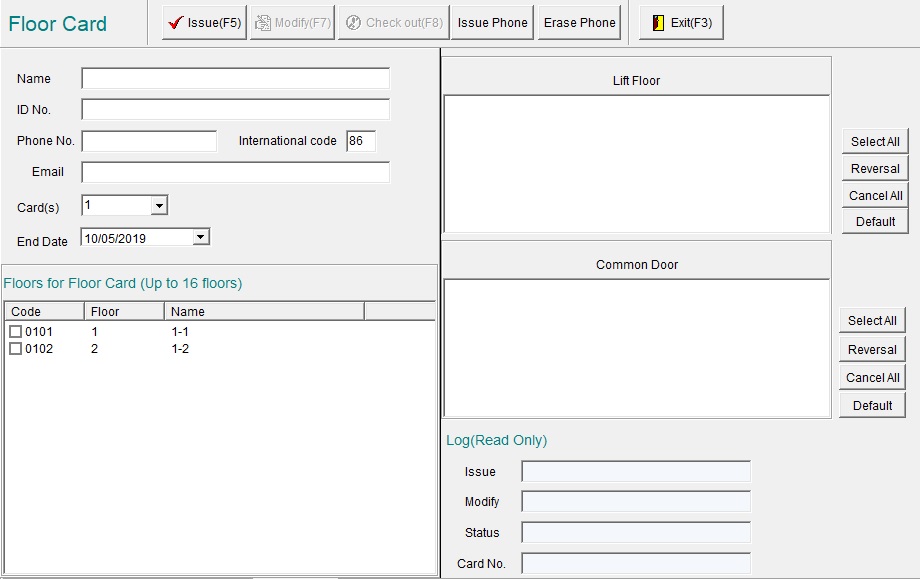
Figure 56
Housekeeping (HSKP) Card
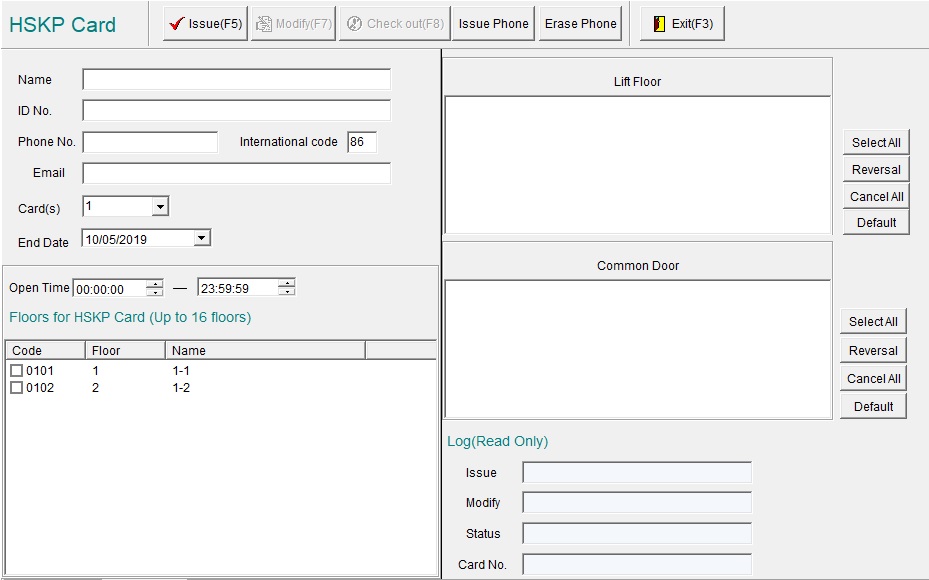
Figure 57
Staff Card
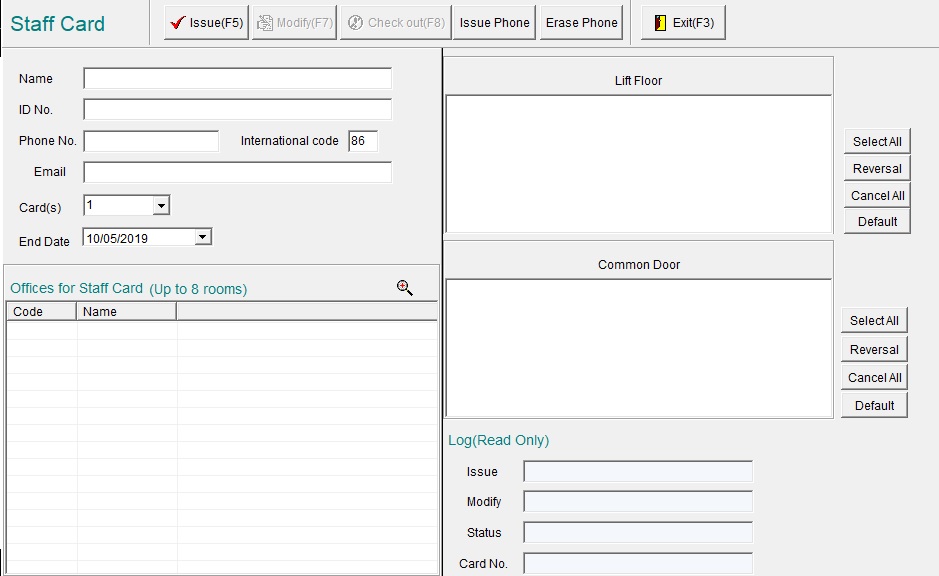
Figure 58
Guest Card
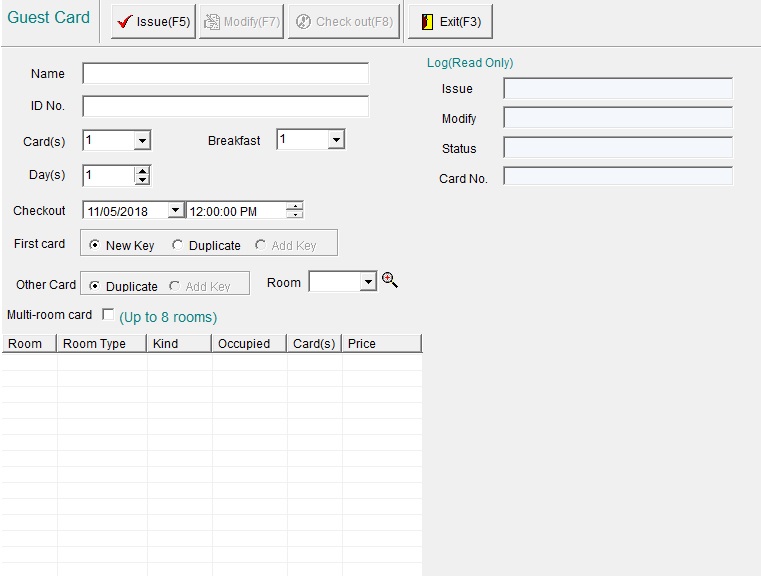
Figure 59
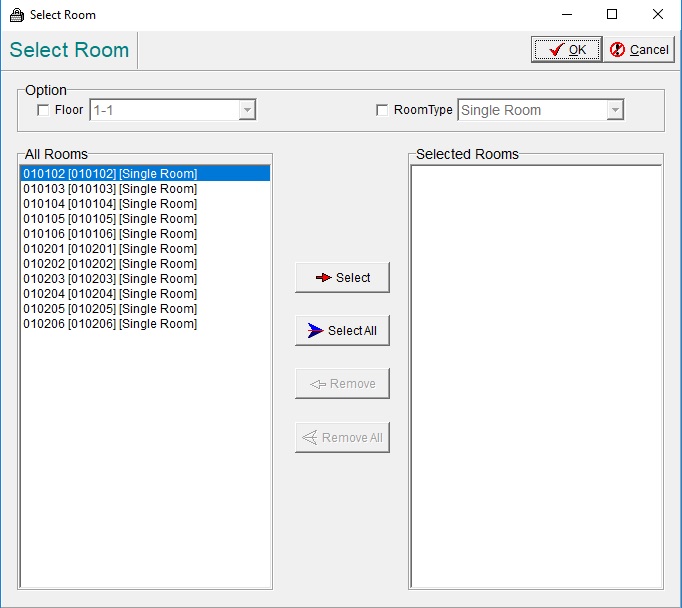
Figure 60
Meeting Card
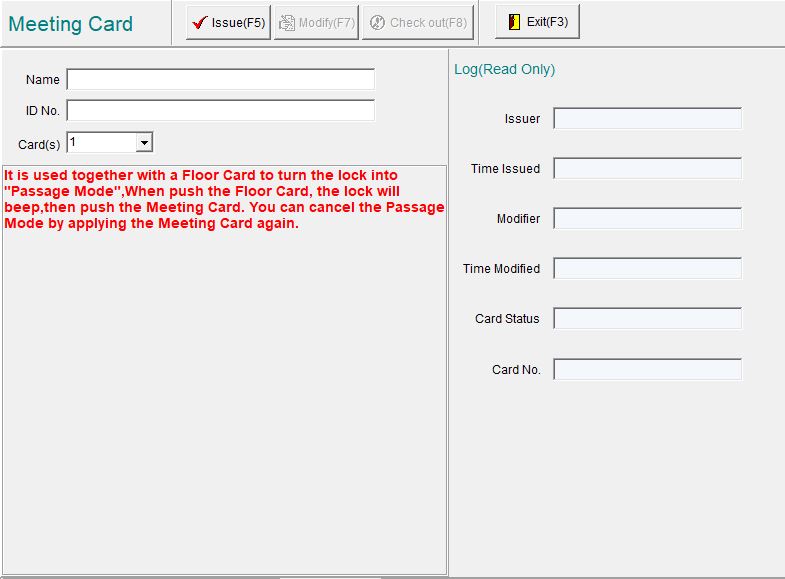
Figure 61
Optional: Enter the name and ID Number of the card holder for record keeping.
Inhibit Card
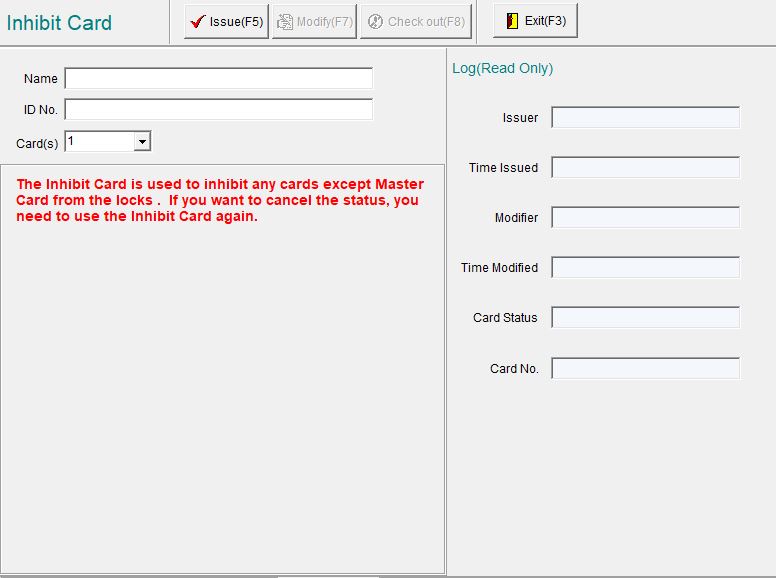
Figure 62
Optional: Enter the name and ID Number of the card holder for record keeping.
Erase Card
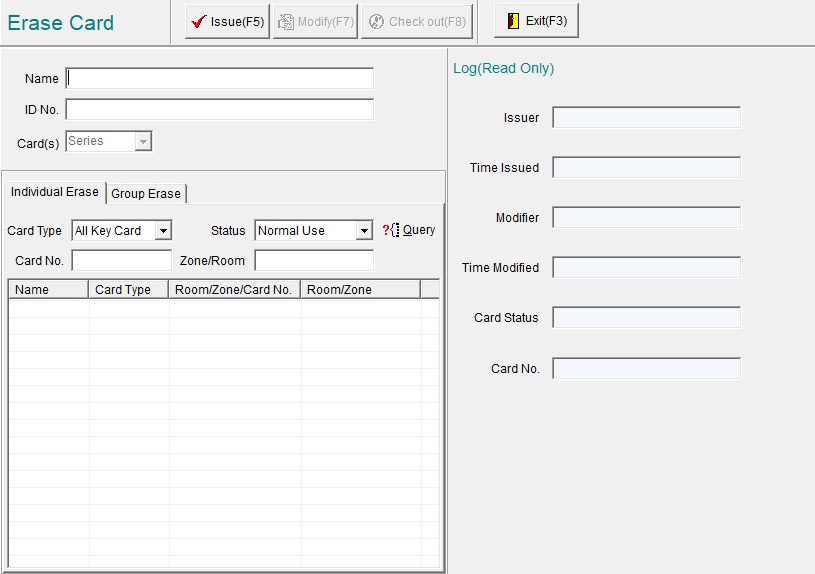
Figure 63
Optional: Enter the name and ID Number of the card holder for record keeping.
Query Card
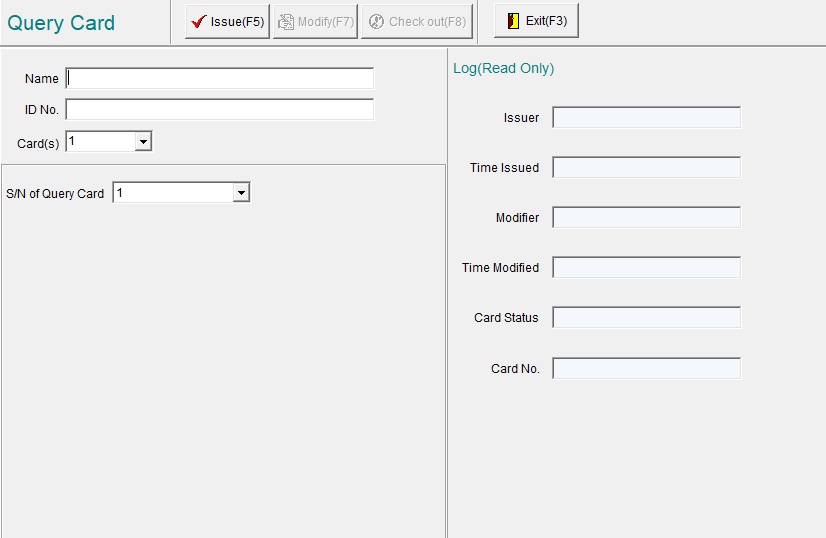
Figure 64
Download and Audit Lock Open Events
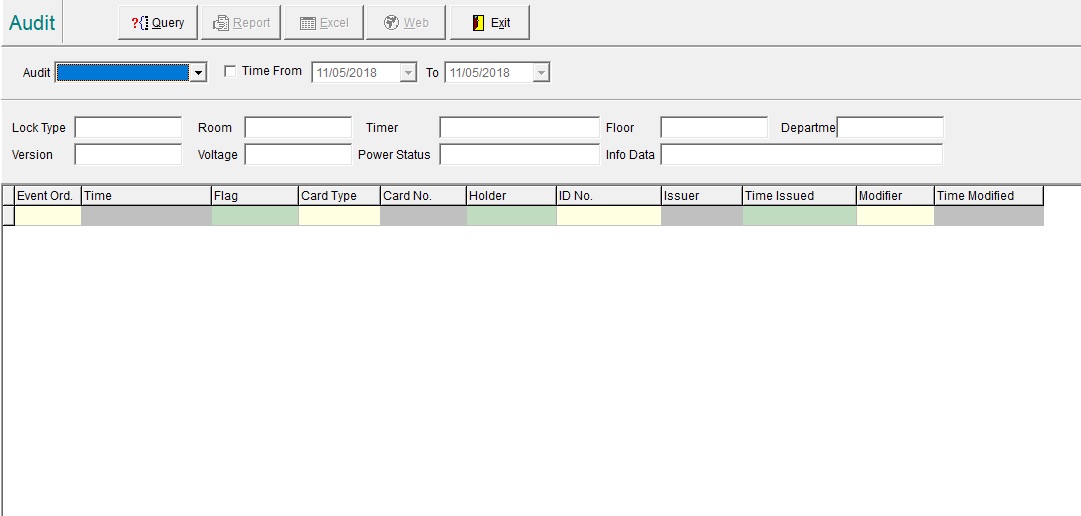
Figure 73
Reports
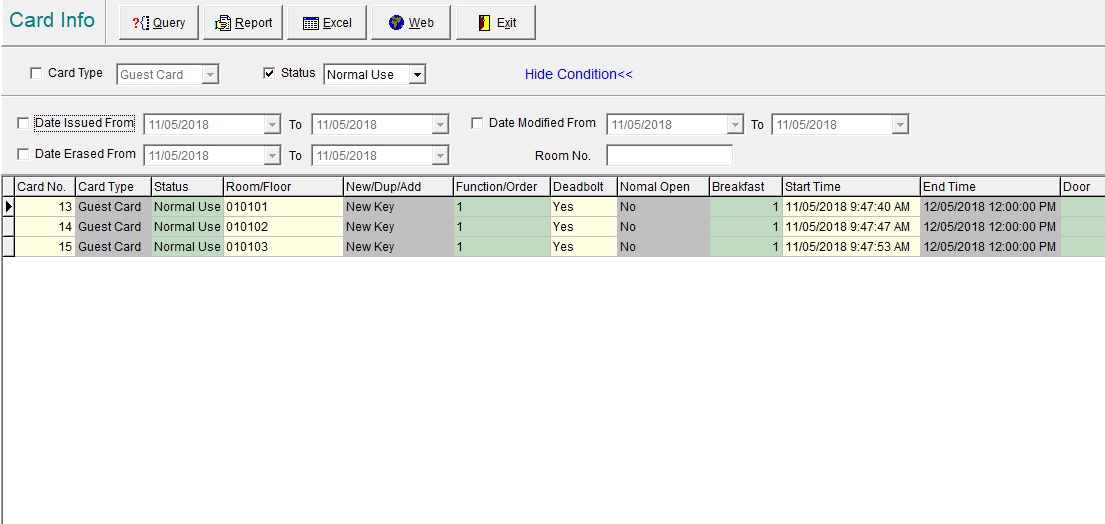
Figure 74
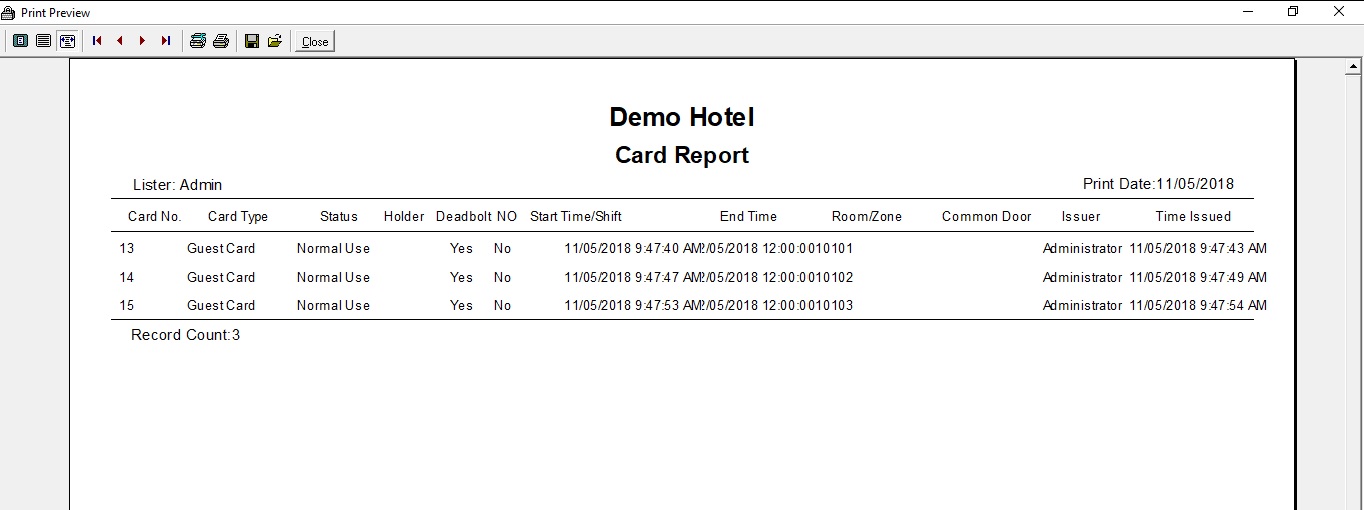
Figure 75
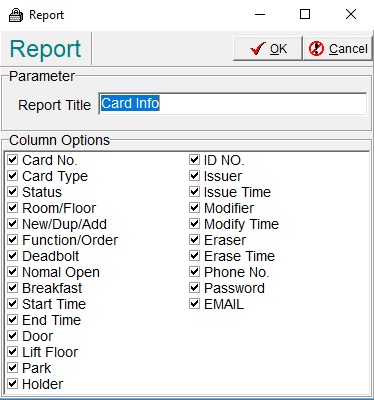
Figure 76
Group Card
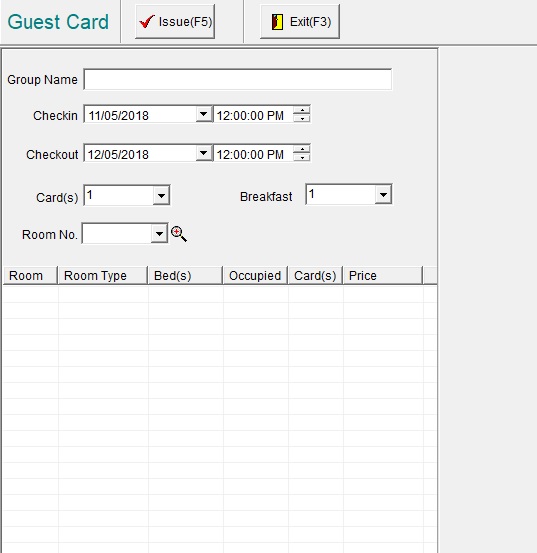
Figure 65
Read Card Data
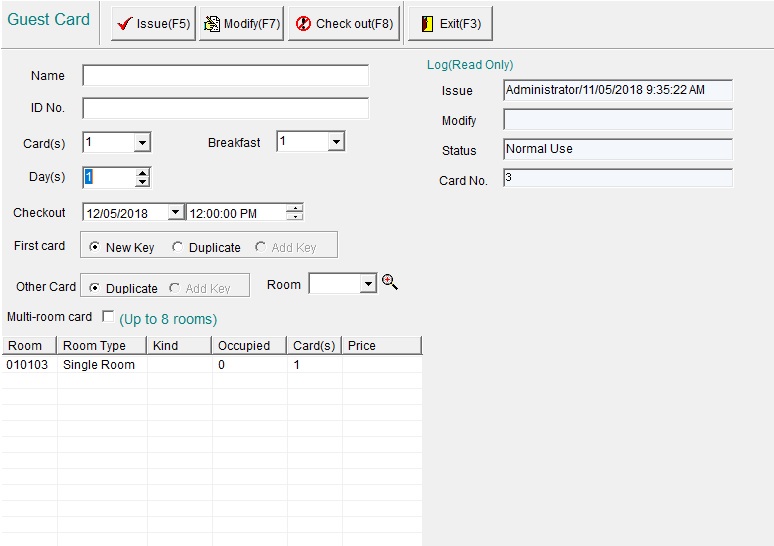
Figure 66
Modifying Card Data
Guest Check out
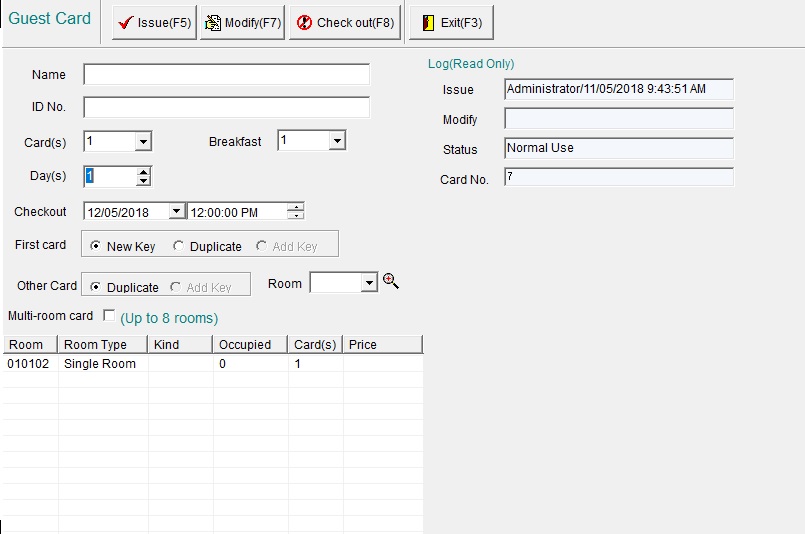
Figure 70
Lost and Damaged Card
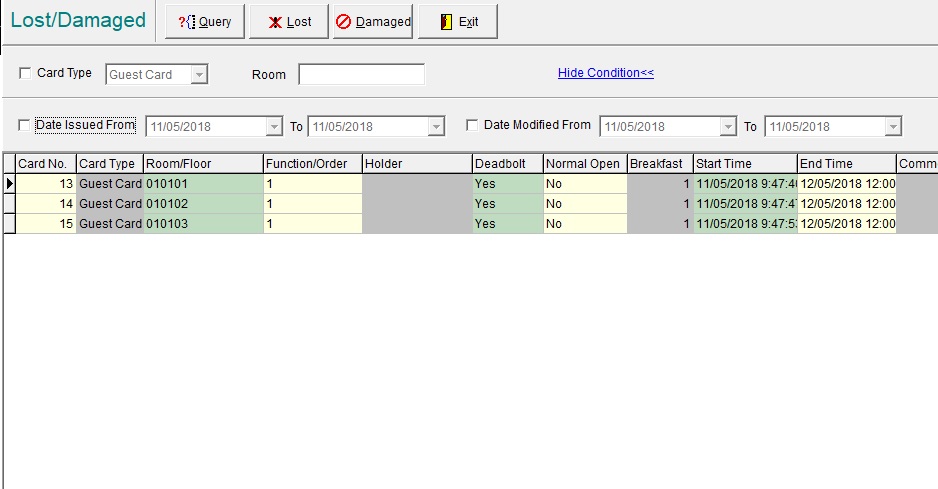
Figure 71
Booking Management
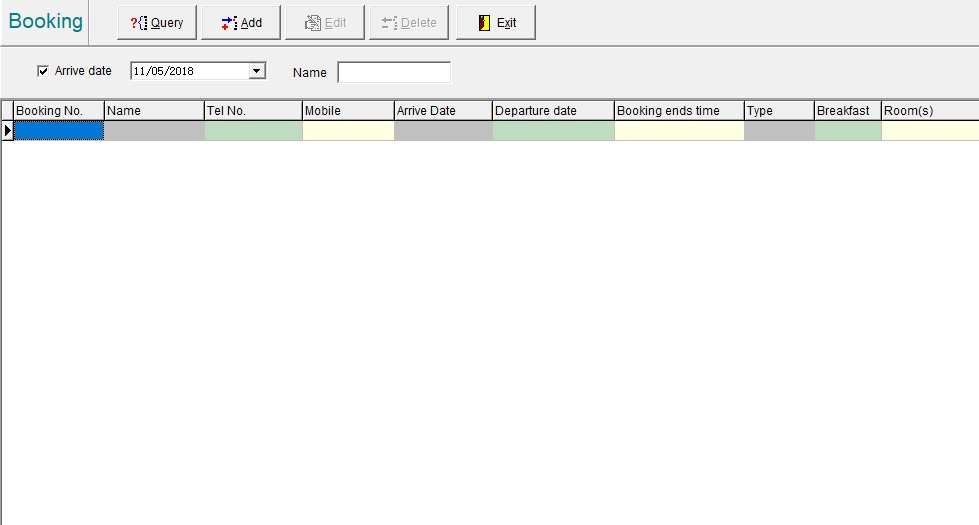
Figure 77
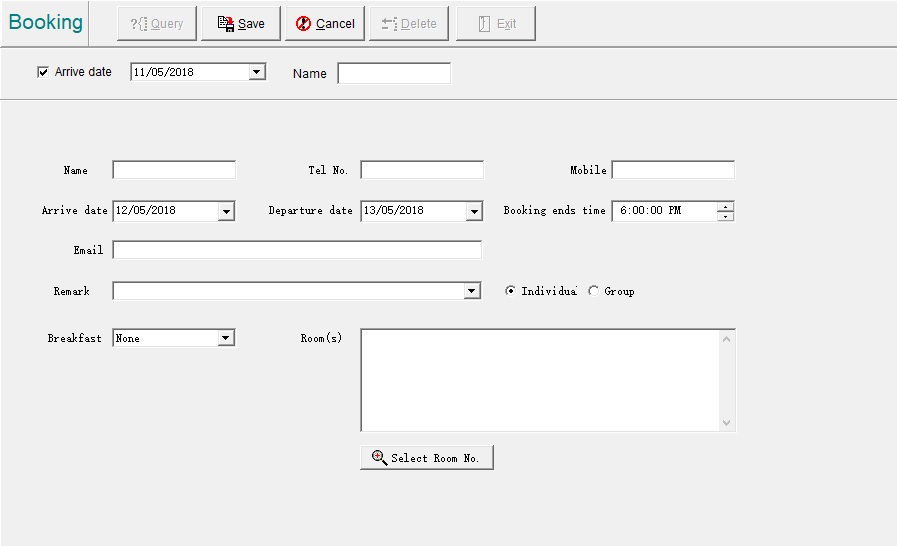
Figure 78
Reception
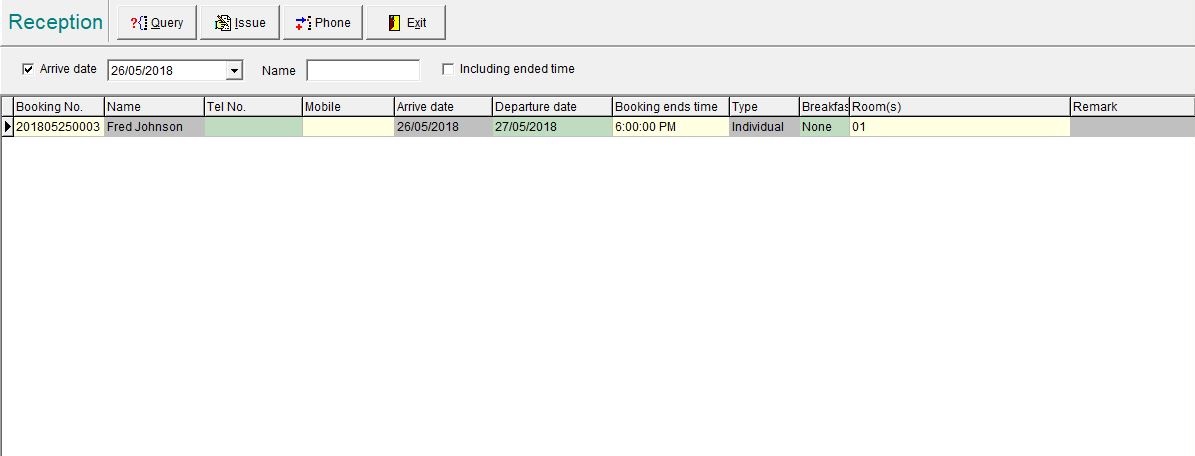
Figure 79
Others
Setting Window Background
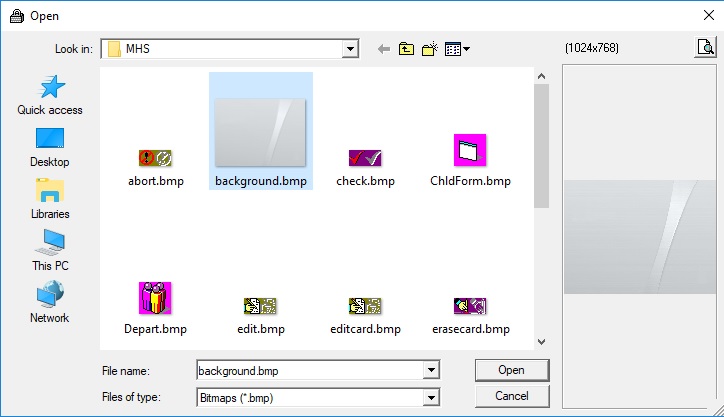
Figure 80
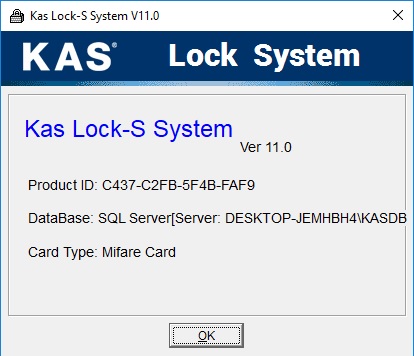
Figure 81
Software License Control
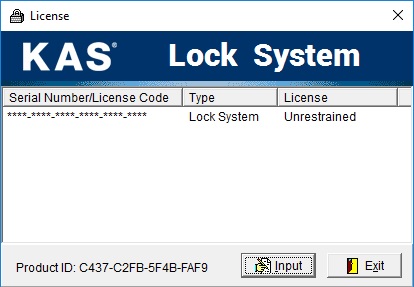
Figure 82
Database Maintenance
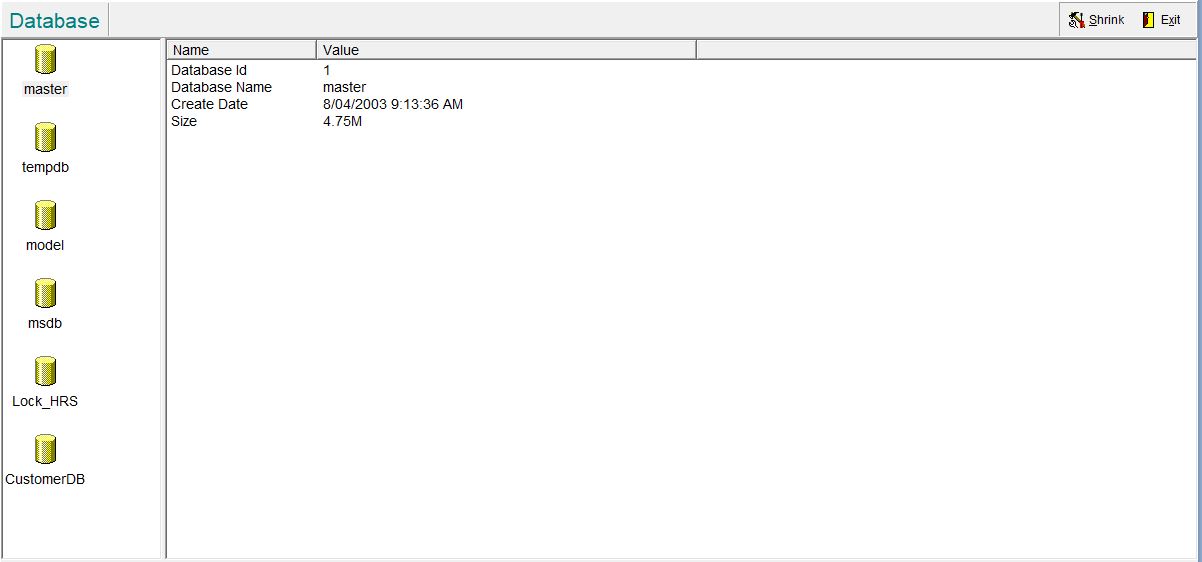
Figure 83
Adding a PIN code remotely to a NEO Lock
Setting a door to "Free Passage"
Access Controls (Common Doors and Lifts)
Common Door Zone
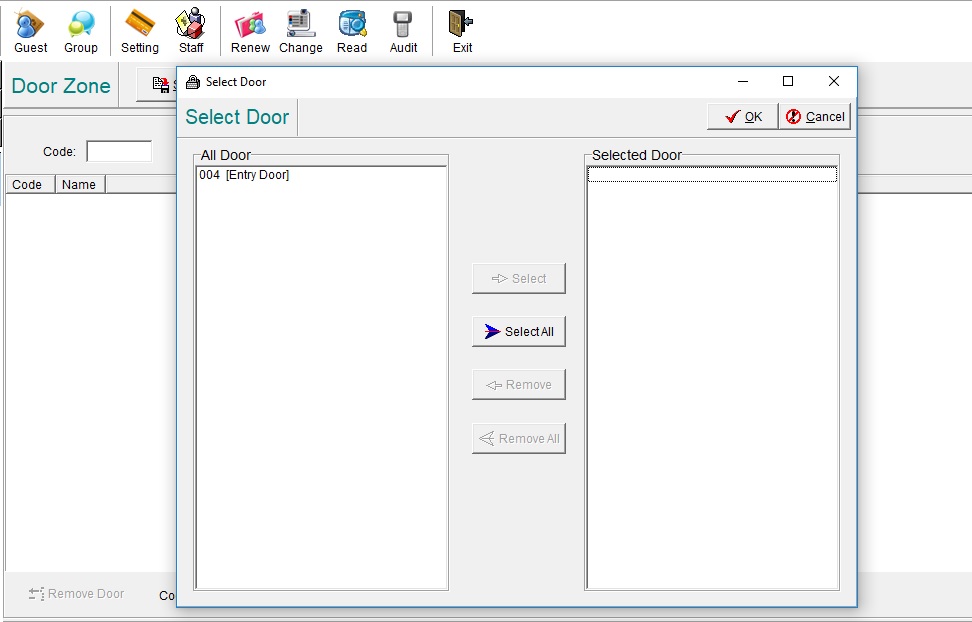
Figure 87
 at the bottom of the Door Zone page to popup the Select door list, "Select" or "Select All" common doors into this zone. Click "Save" and back to Door Zone window.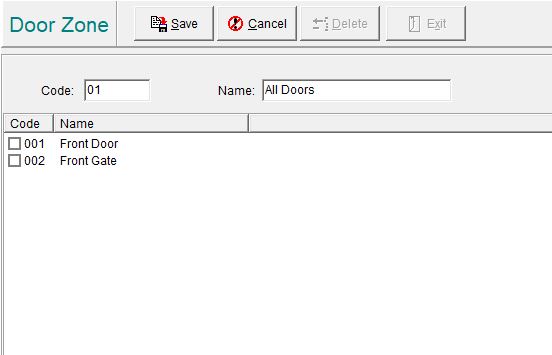
Figure 88
Managing Lifts
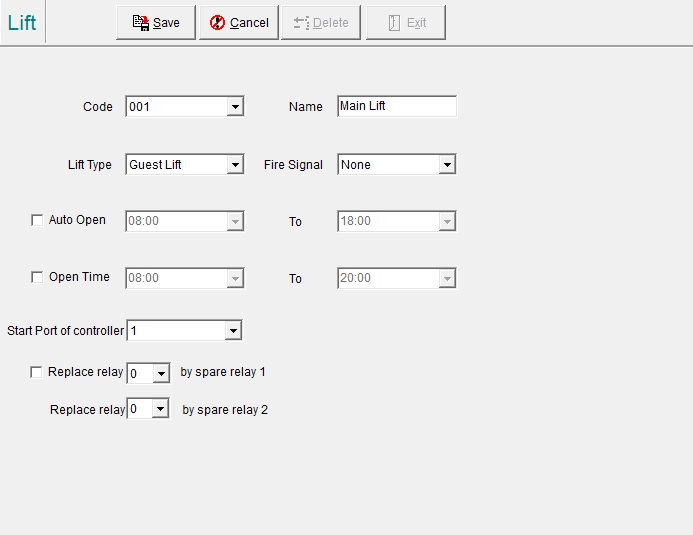
Click "System" then select "System Parameters" in drop down menu (Figure 91)
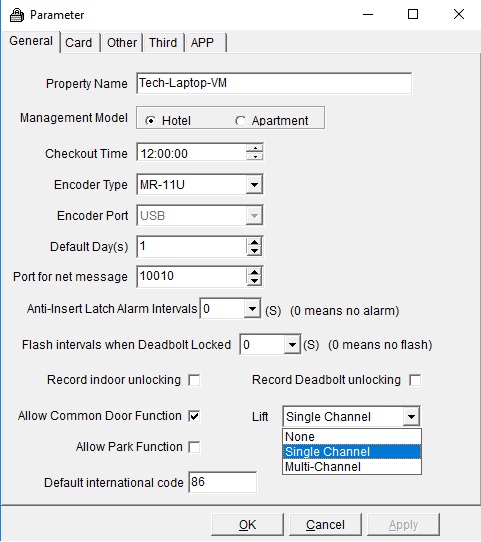
Figure 91
Select the "Lift" dropdown box, and select between Single Channel or Multi-Channel.
The elevator controller with power transformer is built into a metal box, this to be fixed on roof top of lift car with AC power supply.
The main control PCB has 16 ports for connection to control the lift push buttons.
There are also connections to the reader which is fixed inside the lift car.
16 ports can control 16 buttons hence 16 levels. If more than 16 level are to be controlled an expansion controller can be added to allow another further 16 outputs. (Up to 64 levels can be controlled via daisy chaining expansion modules)
Integrating / connecting the controller and reader in the lift should be done by qualified lift technicians.
To add the lift controller: Click [Data] then select [Lift Controller] in pull down menu.
[Lift Controller Ports] : ask for the number of ports on the PCB, normally 16 or 32, select with down arrow
[Floors] : number of floors the hotel wants the controller to control, select with up down arrows
[Port] : ask for the starting port number, select with up down arrows
[Floor Order] : floor to be controlled by first port number
After these parameters are set click [Apply], if no need to change anything click [Save]
To change the setting highlight the port number then click [Edit], change as needed then click [Save]
Note: In example Figure 92, PCB has 16 ports, there are 16 levels to be controlled, will use port #1 as starting port and starting the floor is the 1 floor.
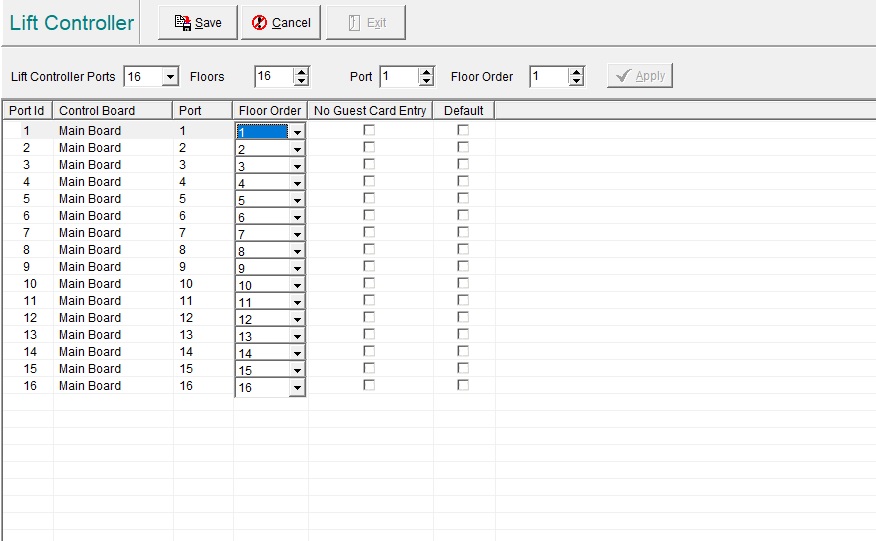
Figure 92
If so desired a lift zone by grouping levels can be applied. This is different from setting common door zone, the zoning is by levels not by lift.
Click [Data] then select [Lift Zone] in pull down menu.
In the Lift Zone window click [Add], then input the [Code] and [Name] of this zone.
Click the [Select Floor] button at the bottom of the window to popup floor level list, [Select] or [Select All] floors to be included into this zone.
Click [Save] and back to Lift Zone window.
In example Figure 93 a Lift Zone with the name Common Lift Access have been created with Floors 0101, 0102, 0103 and 0117 have been included.
Note: To [Edit] or [Delete] a lift zone, first highlight it in the list then click the corresponding icon.
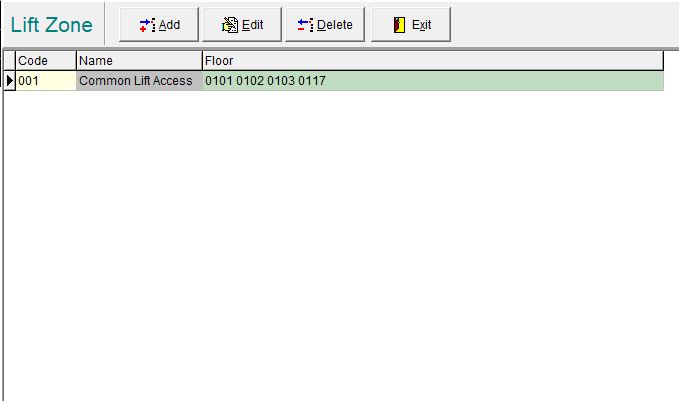
Figure 93
After the lifts are configured into the system, each lift controller must be encoded to accept valid key cards. Similar to encoding guest room locks, the System Card and Parameter Card are needed.
Since the System Card has been issued in previous section only the Parameter Card for each lift needs to be issued, see section 9.2 regarding issuing Parameter Card. The System Card and Parameter Card must be presented to each Lift Controller reader to complete programming.
After configuring and encoding the lift Controllers, users can be given access to lift levels as shown
in Figure 94, select the relevant Lift Level or Lift Zone to give access.
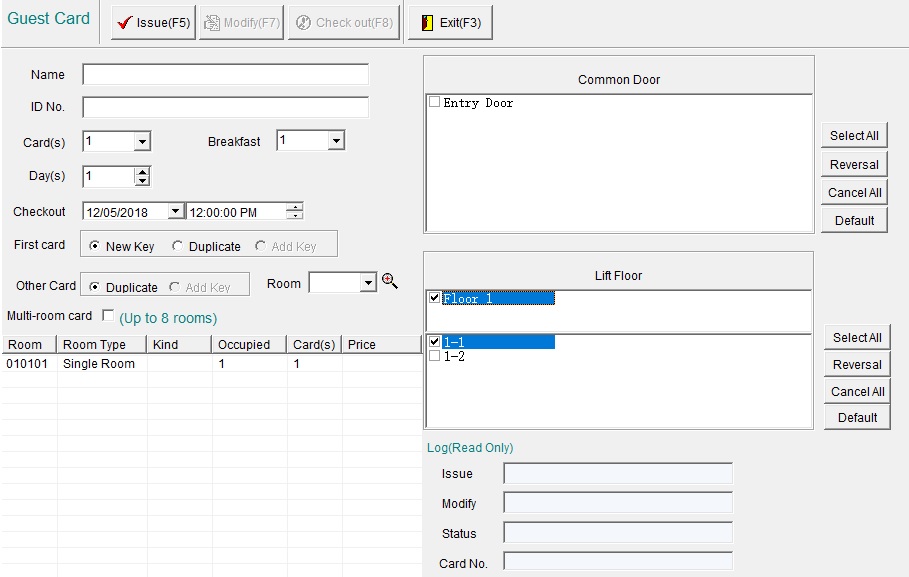
Figure 94
To prevent unauthorized people from entering the parking lot, an access controller can be integrated with the parking lot barrier.
Click [System] then select [System Parameters] in drop down menu and tick the [Allow Park Function]
see Figure 95
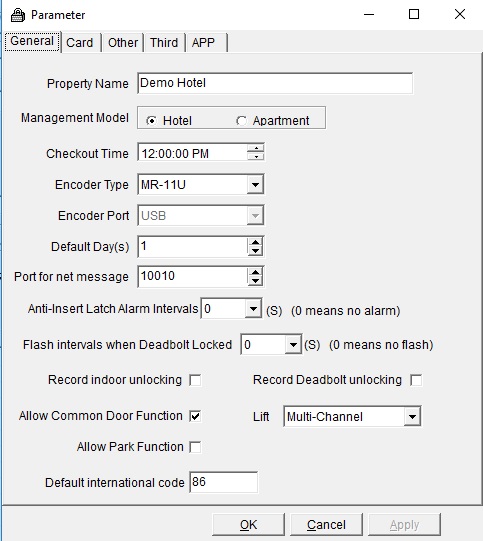
Figure 95
Parameter Card is needed to encode the parking controller and should be integrated by the parking equipment supplier.
The Parameter card is created similar to the Common door and Lift controller see Figure 96.
Select the [Park] tab, and select the signal time (amount of seconds the relay need to latch for)
Select the Park Device drop-down list, choose the role of the reader, entry exit or both.
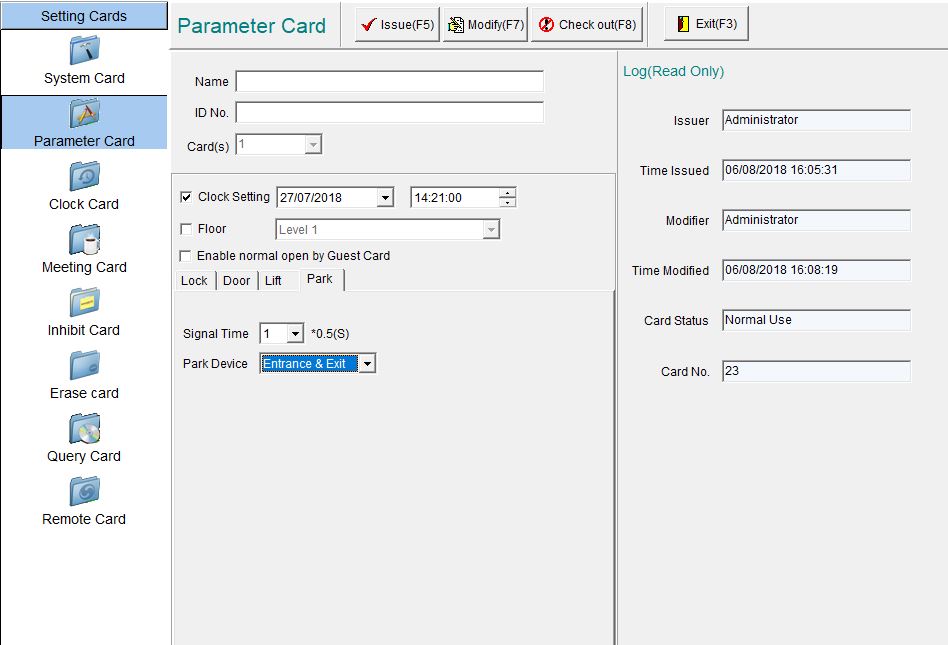
Figure 96
After configuring the Parking Controller, guest are given access to the car park by selecting the [Park]
drop-down list and choosing No permission, Can exit, Can entrance or Can Access(Can exit and entrance)
see Figure 97
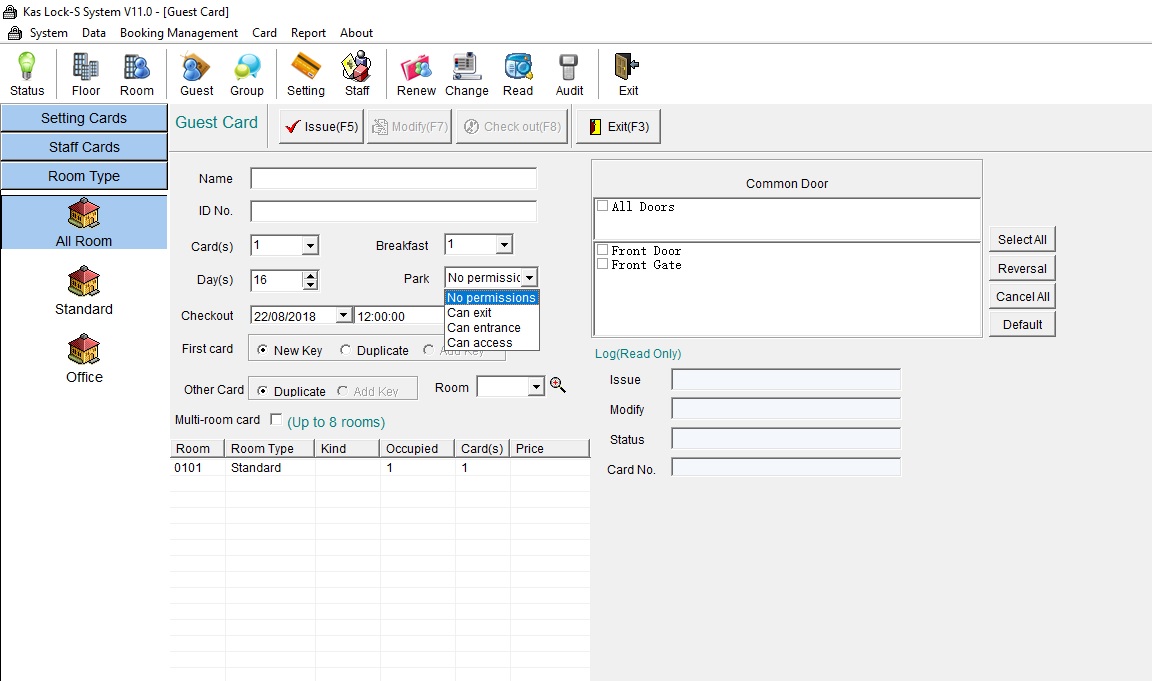
Figure 97
—END—