Setup and Configuration
To access the KAS Cloud Web Console you need to have the app and set up the hardware. (Skip if completed)

Using the KAS Cloud Web console requires gateways
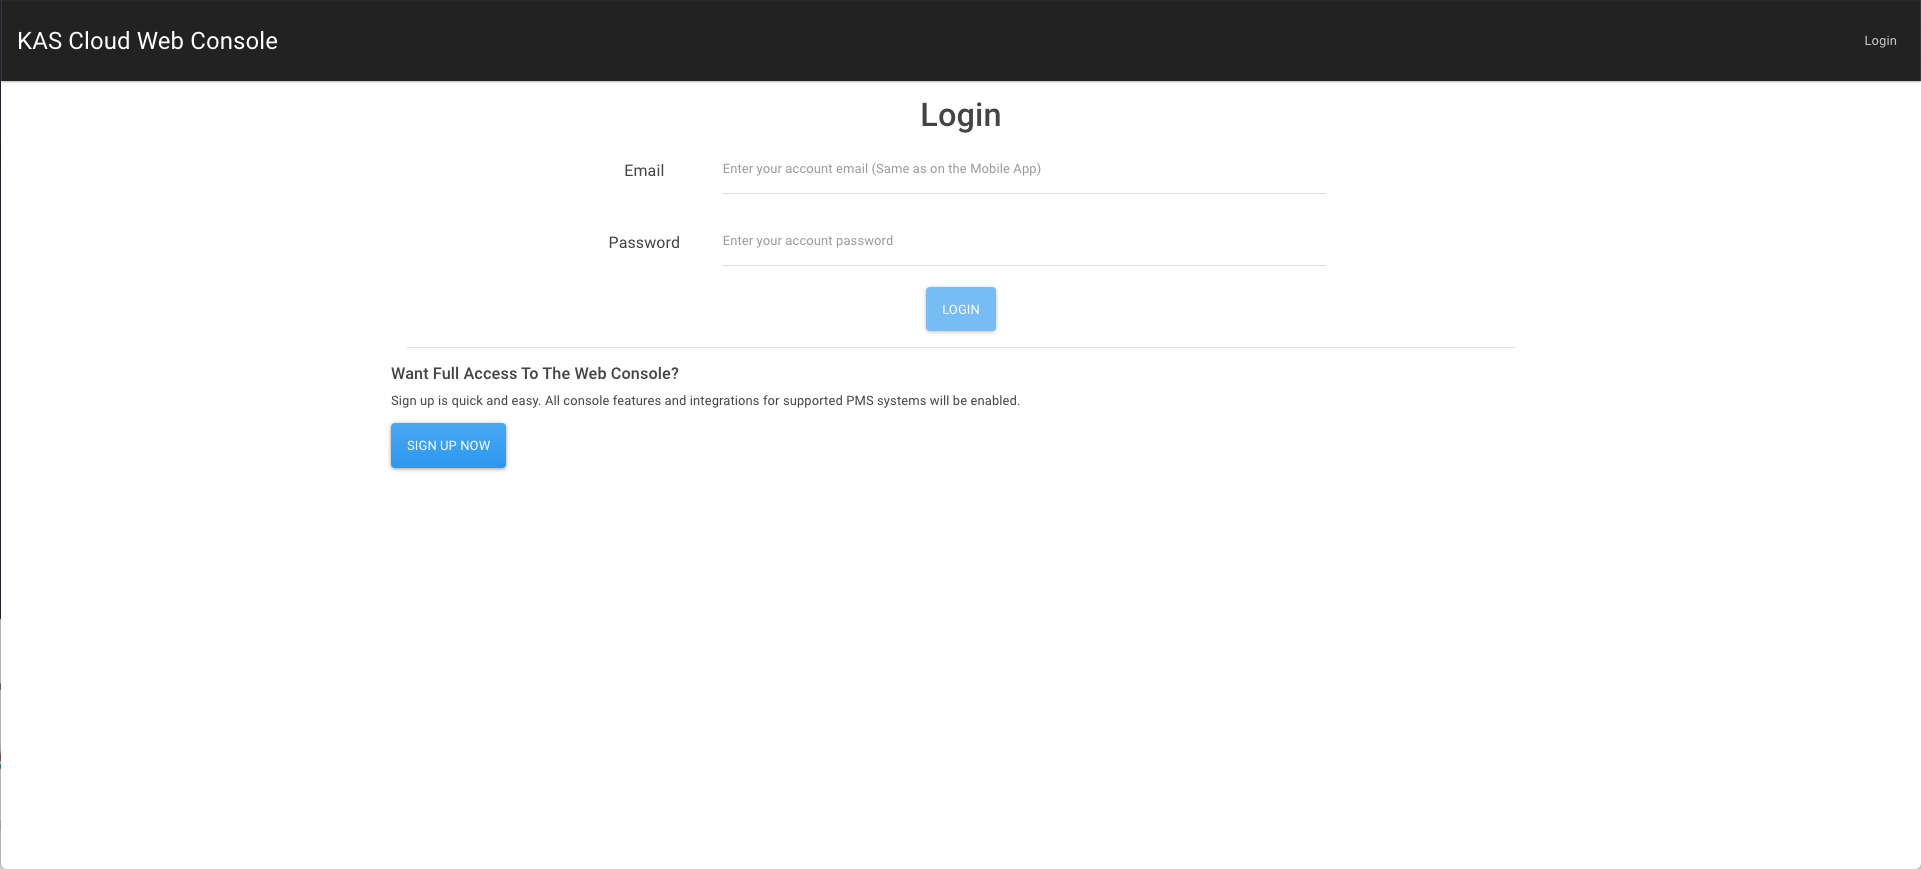
Login Page
Click on the link to access the web console
Login with the same credentials as you logged in on your mobile app and click on login.
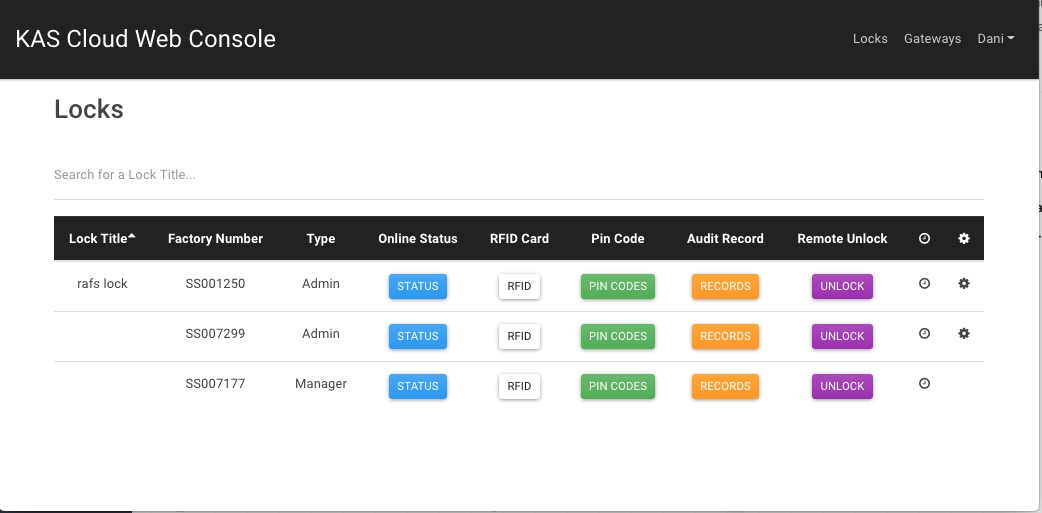
Your Activated Locks
After Logging in you will be able to see the list of the locks that you activated using the mobile app.
Set the Clock on the Locks

If you have not set the clock with the mobile app you will need to set the Clock for the locks to work.
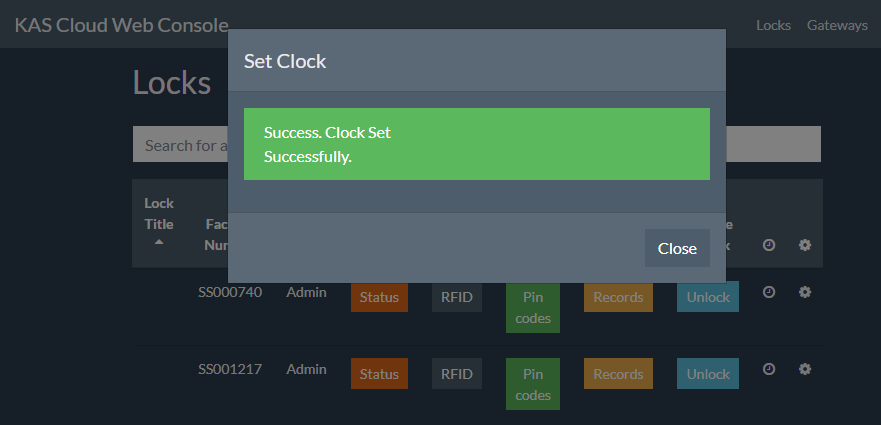
Click the clock symbol showing to set the time. This will need to be performed on every lock.
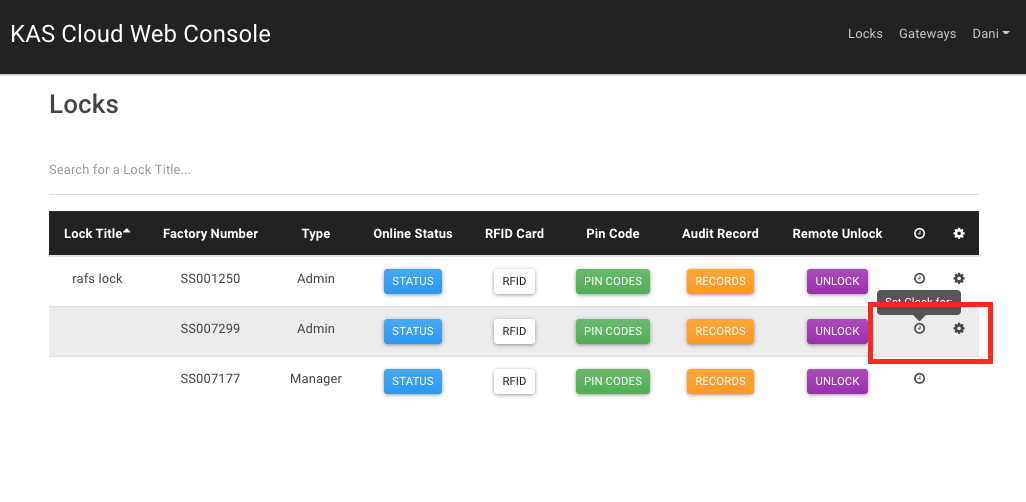
After setting the clocks you will see the following screen press Close.
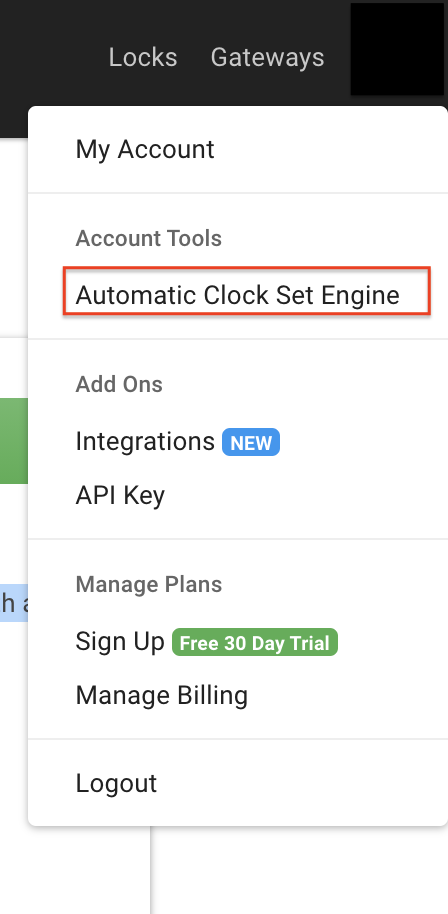
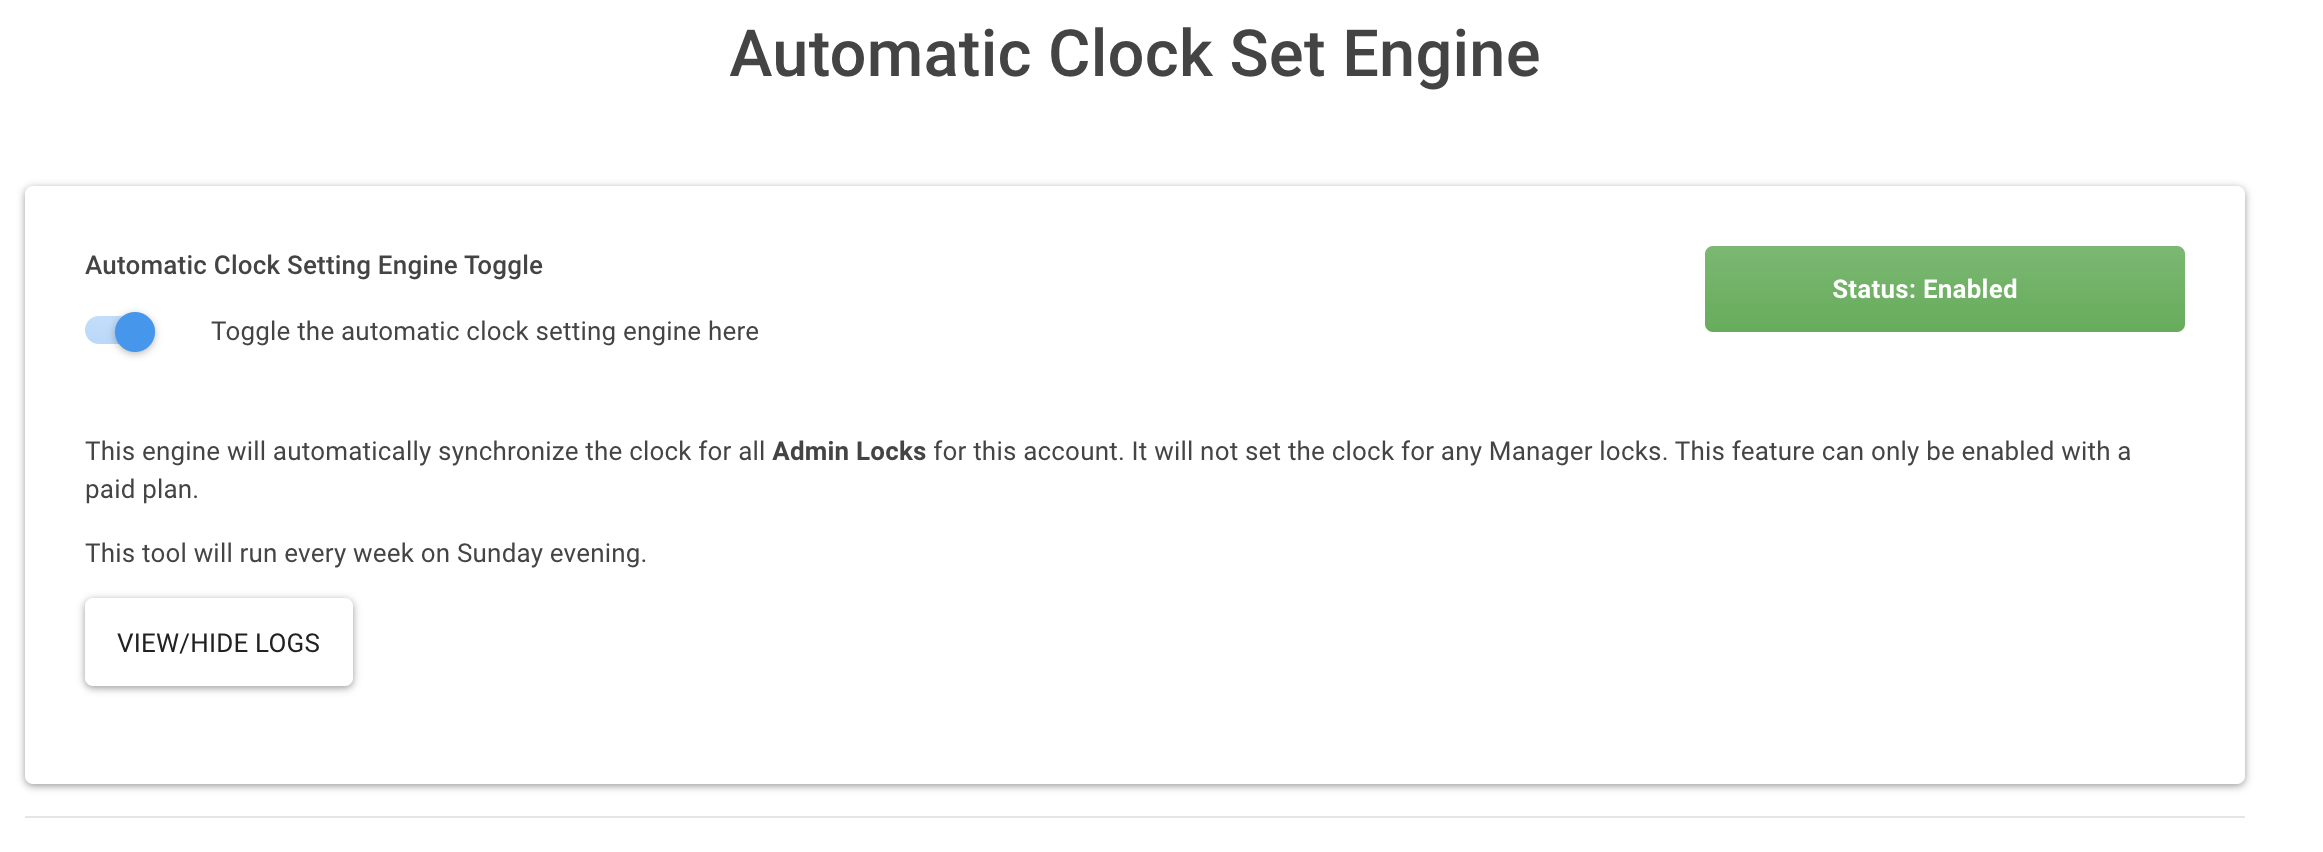
Auto Set Clock Engine
This feature can only be enabled with a paid plan.

This engine will automatically synchronise the clock for all Admin Locks for this account every week on Sunday evening. (
It will not set the clock for any Manager locks.)
It will not set the clock for any Manager locks.)
- Click your name in the top right and select Automatic Clock Set Engine
- To enable, toggle on if you wish to use this option
 .
.
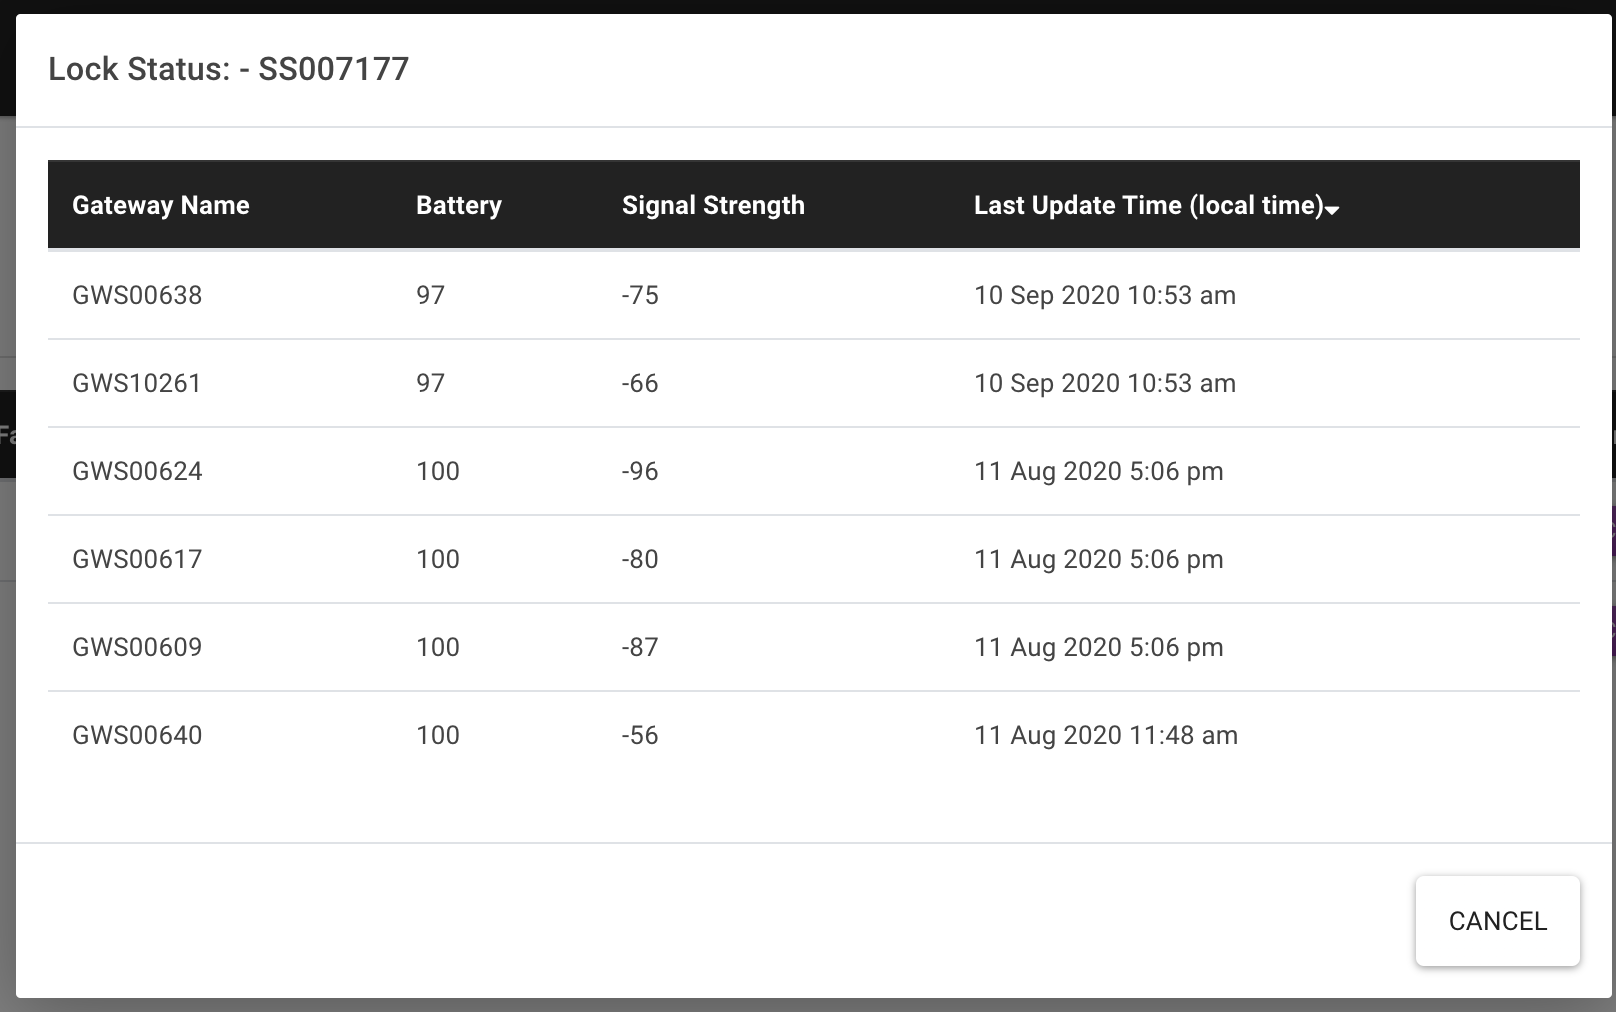
Lock Status
The lock status will show you the following
- Gateway Name – This is the gateway the lock is connected to. There may be multiple gateways that your clock can reach.
- Battery – This is displayed as a percentage
- Signal Strength – Value of Lock to Gateway signal quality. (Optimum for best results)
- Last updated time – This will show the last time the gateway connected to the lock
To Add RFID/FOBs
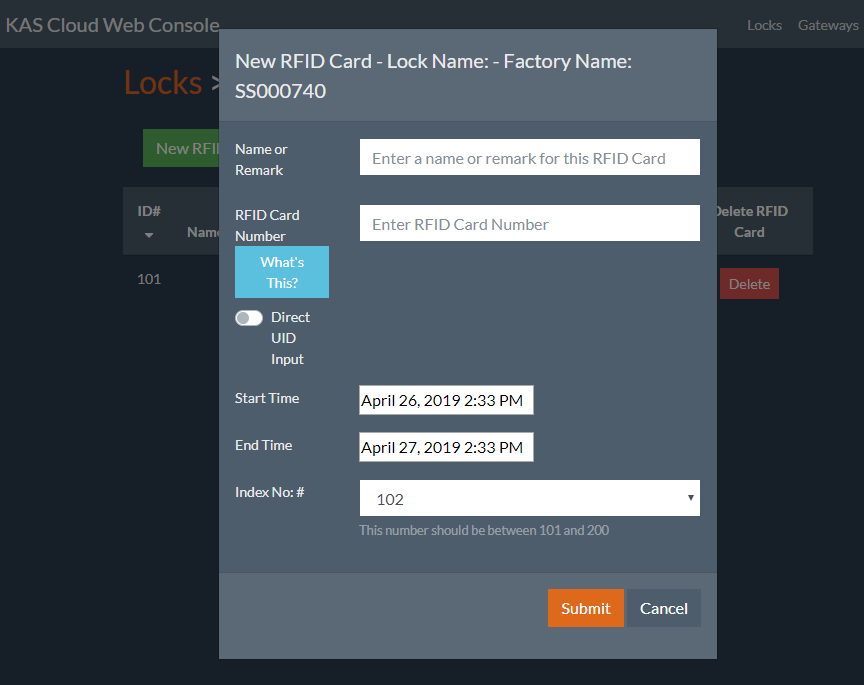
- To issue Remote RFID card click on the RFID and click on New RFID Card
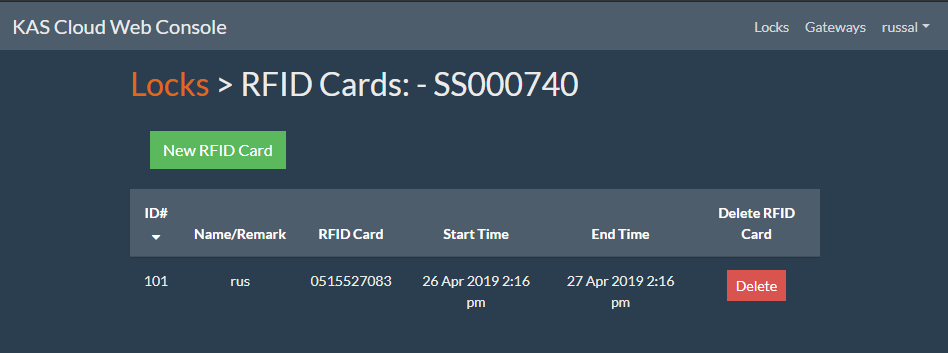
- Enter the details and press submit. After clicking submit check the card on your lock it should unlock the lock now.
To Add Pin Codes
- To unlock the lock remotely via PIN Code, click on the pin codes and click on New Pin Code and follow the instruction on the screen to add a pin code
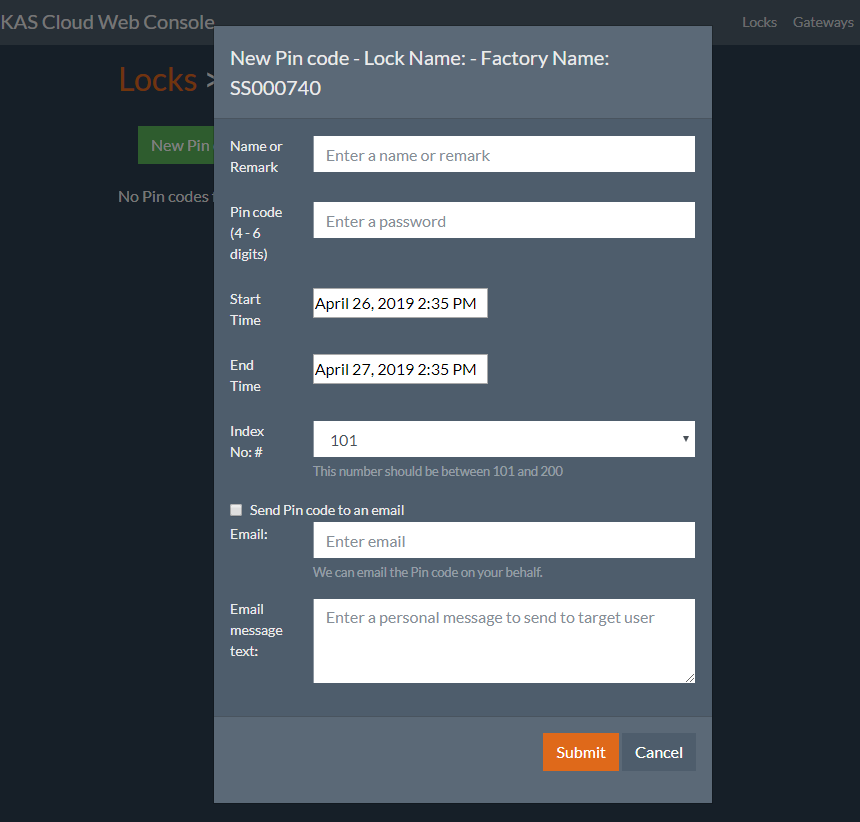
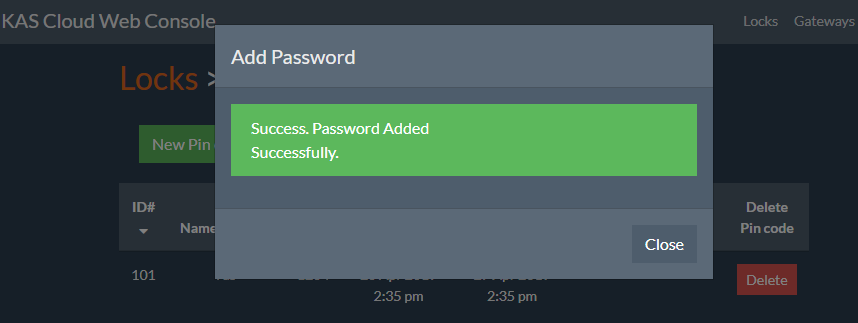
- After submitting the Pin code, you will see the following screen press close and try the pin code that you generated followed by the “#” key on the keypad of your lock and it should unlock the lock now.
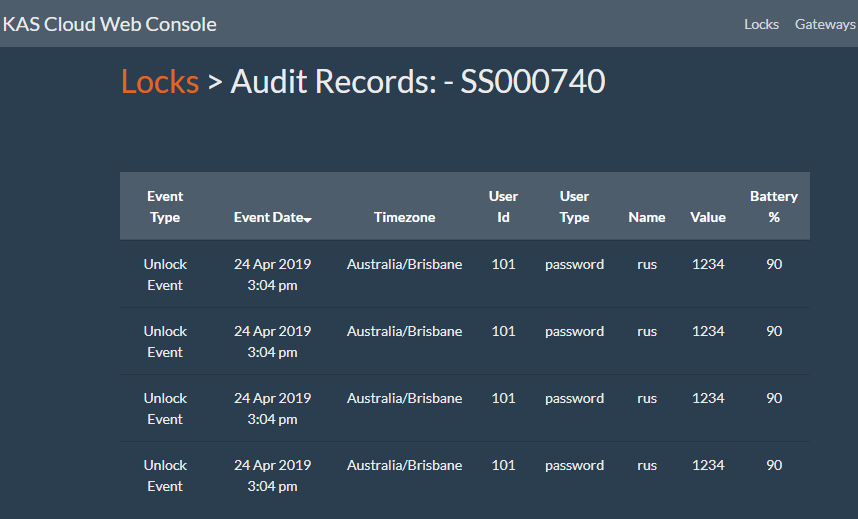
Lock/ACR Audit Records
- To see the Records of the lock, click on the Records.
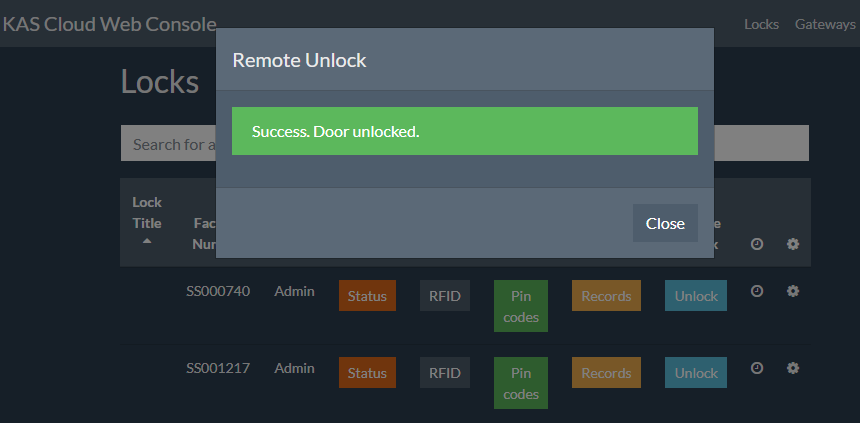
To Remote Unlock
- To unlock the lock remotely click on Unlock and it will automatically unlock your lock.